


How to install Octane render for Cinema 4D?
It’s very easy to install Octane Render for Cinema 4D. This article is to help you do that, no matter you use Windows or macOS. Let’s follow the instructions and explore the fastest unbiased GPU renderer on Cinema 4D.

How to install Octane render for Cinema 4D on Windows?
Prepare all necessary tools: it includes Octane installer and license, Maxon Cinema 4D. Install Cinema 4D first on your computer, and make sure you create and buy a license for Octane.
Download the Octane installer: you log in to your Otoy account and click the Downloads page to download the installer of Octane to your computer.
Start the installer: after downloading, you can now start the installer. Just click Next when the setup prompt and License Agreement appear.
Choose the suitable Cinema 4D version: Here, you can select the Cinema 4D version you want to install the Octane render plugin for. Check the box “Automatically remove manually installed plugins” if you have installed old Octane plugins and you want to remove them.
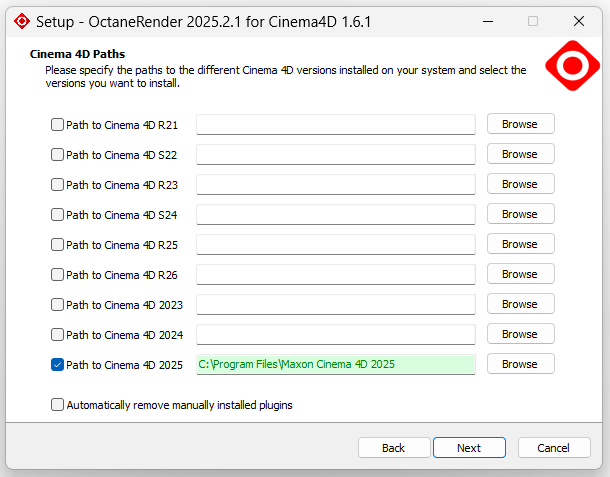
Click Next and follow the instructions to finish the installation process.
How to install Octane render for Cinema 4D on macOS?
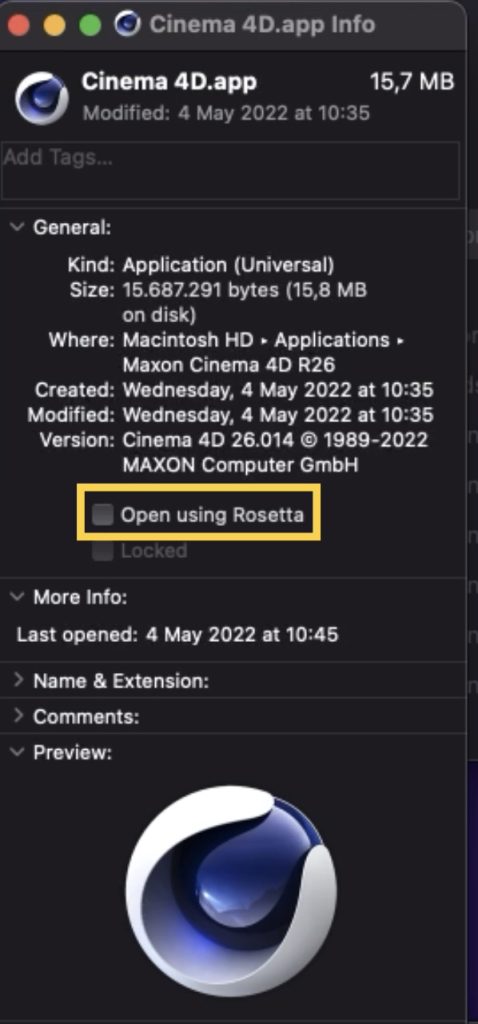
Disable “Open using Rosetta”: in the Info panel of Cinema 4D, unselect the option “Open using Rosetta”.
Download the Octane installer: you log in to your Otoy account and click the Downloads page to download the installer of Octane to your computer.
Uncompress the downloaded file: after downloading, you should unzip the file.
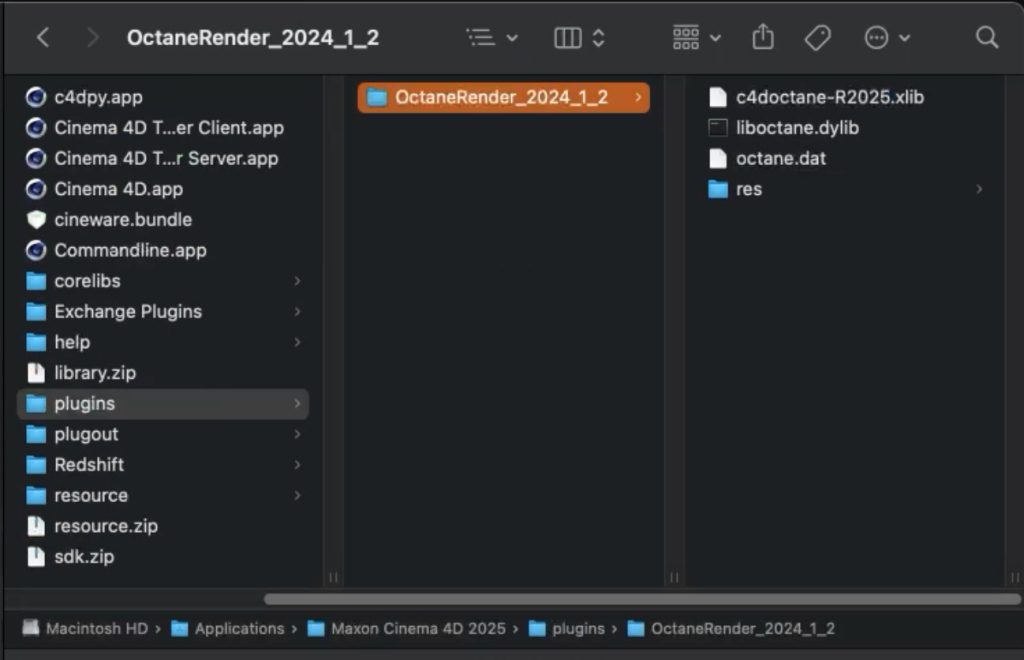
Copy the OctaneRender folder into the plugins folder: now come to the directory: HD/Applications/Maxon Cinema 4D R2X/plugins and paste OctaneRender folder here. If you don’t have a plugins folder, create it in lowercase.
Remove incompatible files: open the OctaneRender folder you have just copied there and delete any c4doctane-R2X. xdlib files not associated with your R2X version, leaving only the c4doctane-R2X.xdlib file matching your Cinema 4D version. For example, if you are using C4D R2025, you would keep just the c4dOctane-R2025.xlib file.
Start Cinema 4D: open Cinema 4D, and you may have to log in to your Otoy account to activate the plugin.
Final thoughts
To wrap up, this article has guided you through the complete process of installing OctaneRender for Cinema 4D on both Windows and macOS, ensuring that you can set up the renderer smoothly regardless of your operating system. By following the instructions, from downloading the correct plugin to integrating it into Cinema 4D, you’re now ready to unlock the powerful rendering capabilities Octane offers. With everything properly installed, you can begin exploring Octane’s advanced features to elevate your 3D projects with faster, more realistic, and professional-quality results.
See more:


No comments