


How to add Motion Blur to Cinema 4D viewport render?
Motion blur is an effect that enhances your animation’s dynamism and visual appeal. Using it in a smart way makes your Cinema 4D scene more realistic and natural. However, sometimes in Cinema 4D, you don’t see it show up in real-time, but you have to add it manually. In this article, let’s check how to add motion blur to Cinema 4D viewport render.
Table of Contents
Adding motion blur to Cinema 4D viewport render
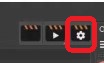
First, go to your render settings by clicking this icon on the top right.
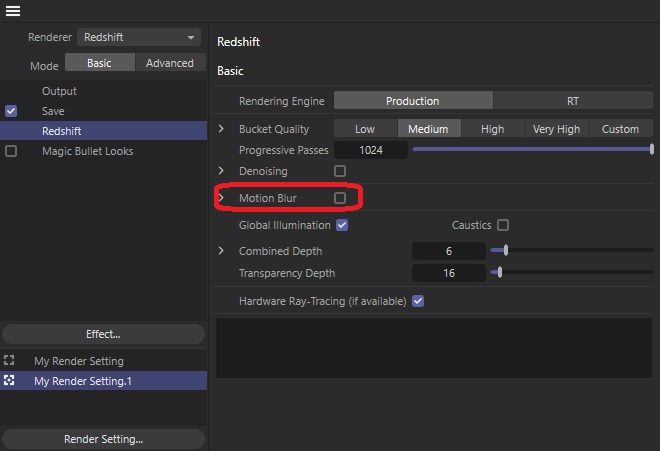
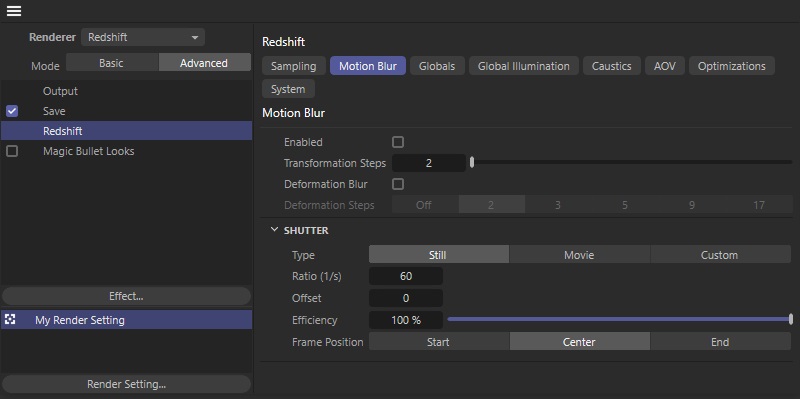
There you will see Motion Blur checkbox on the left side, toggle it. That’s how you add motion blur to your Cinema 4D viewport render.
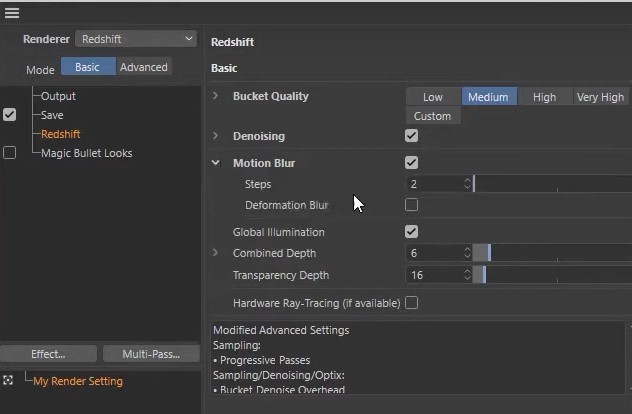
Motion blur can be adjusted in Basic and Advanced mode. In Basic, there are only the Steps and Deformation Blur options.
Steps is like the quality of your motion blur and if you increase it, the result of the formation blur will be cleaner. Deformation Blur will track the motion of individual vertices.
In Advanced mode, you will see more options for settings. There are three different Shutter modes available to control the amount of motion blur:
- Still: This is the default setting and typical for digital cameras. The Shutter time is measured in fractions of a second.
- Movie: On traditional film cameras, the shutter is formed by a disc rotating in sync with the frame rate. Inside this disk is an opening whose size is specified by the ‘Shutter Angle’. In this mode, you can use angle values to control the exposure time relative to your frame rate.
- Custom: Here you can specify the exposure time relative to the frame duration given by the frame rate of your animation.
Why add motion blur to Cinema 4D?
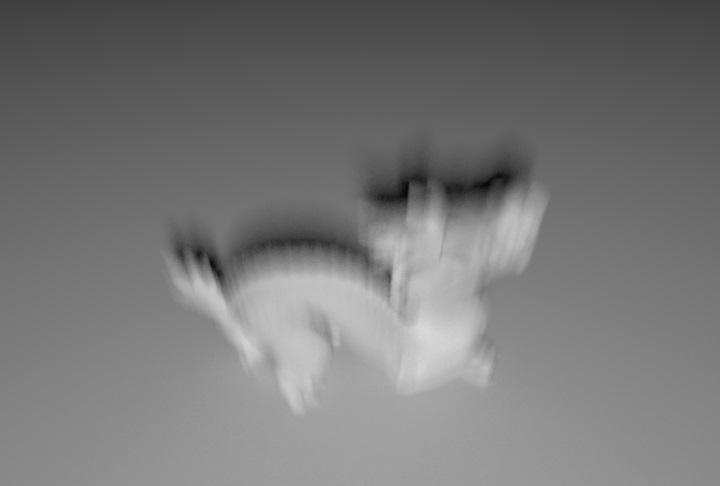
Motion blur helps add the blur effect to images or objects in motion, so when the human eye perceives motion in a scene, it looks more realistic. It’s also a way to hide choppy framerates or bad graphics, allowing you a better viewing experience.
So why should we add motion blur in Cinema 4D, or any other 3D application scenes? Let’s take a look at some reasons:
Enhancing realism
Motion blur mimics a real effect of object movement, creating a blur, helping a scene look more natural in human eyes, rather than a series of static images.
Reducing choppiness in animation
In animation scenes, we always want it to look as smooth as possible, which results in high frame rates. However, low frame rates, if combined with motion blur, could achieve a nice animation sequence, where motion blur helps blend these individual frames together.
Even in high frame rate cases, motion blur also helps reduce the aliasing, making your objects more sharp.
Some tips for working smoothly with motion blur
Motion blur can be computationally and memory-intensive. If you use it or configure the high-quality settings, it can cause longer render times. Consider it carefully before tweaking.
Sometimes, the motion blur effect cannot be seen in the viewport, real-time, or interactive rendering. However, it is visible when you render to the Picture Viewer or use a bucket rendering option.
If you have multiple computers at home, consider using Cinema 4D’s Team Render for high-quality motion blur. It will distribute the workload across your nodes, speed up the render times without sacrificing the quality of your final result.
Remember to check and try different camera angles and paths before actually rendering the scene.
Although Cinema 4D motion blur is good enough, sometimes you can seek help from another application like After Effects to adjust the final look.
Wrap up
As Redshift becomes the standard renderer of Cinema 4D, it’s easier than ever to enable motion blur. When adding a motion blur effect to your Cinema 4D scene, it will really help you to create a visual experience of speed and motion, taking your animation into a higher level of realism. However, remember to use it carefully to simulate your desired effects without sacrificing the render times.
See more:


No comments