


How to render a Cinema 4D & Redshift project on GarageFarm
Cinema 4D & Redshift from Maxon are an excellent combination for blazingly fast, production-quality rendering. This combo of powerful 3D tools is supported among many render farms. In this article, we’ll show you how to render a Cinema 4D & Redshift project on GarageFarm in detail.
Table of Contents
1. Create an account and setup renderBearmer
First, you go to GarageFarm and create an account of yours. Then log in your account, you are in the Web Manager. This is where you monitor the render process after submitting the project. Before submitting, you must set up renderBeamer for your application.
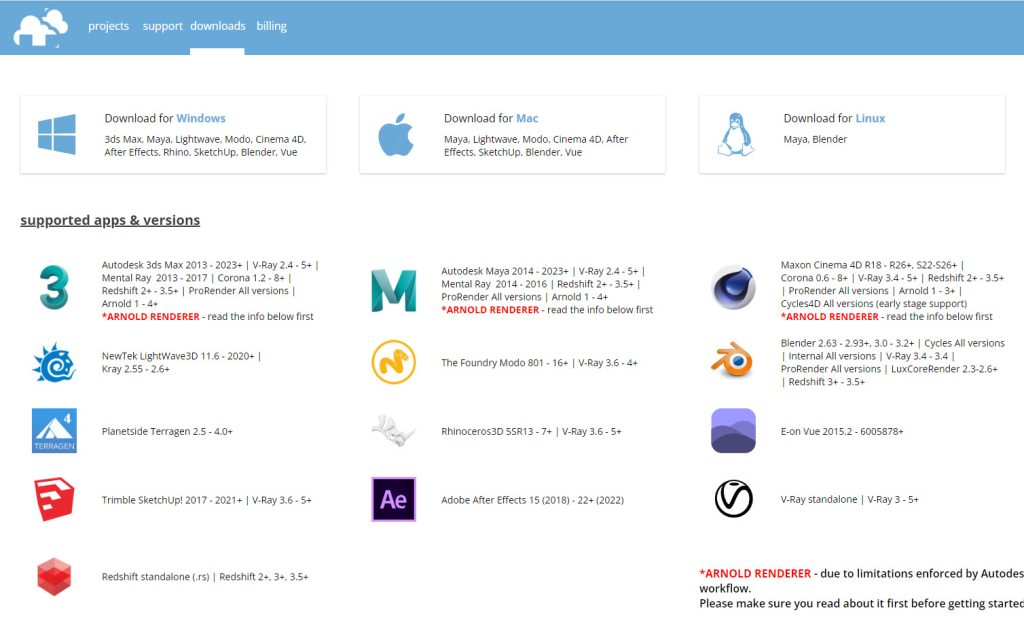
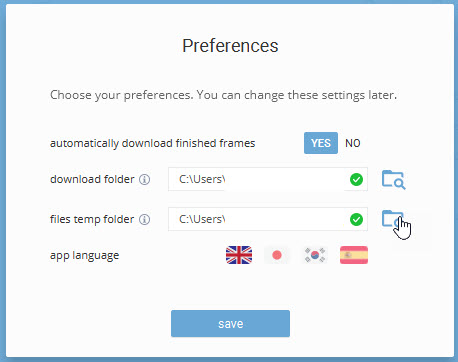
Download renderBeamer in Download tab, choose the suitable sersion for your operating system. After installing and starting the app, you need to choose the default download and temporary folder. These paths will be used to store the render output or project’s temporary files. Next, log in using your GarageFarm account id/email and password.
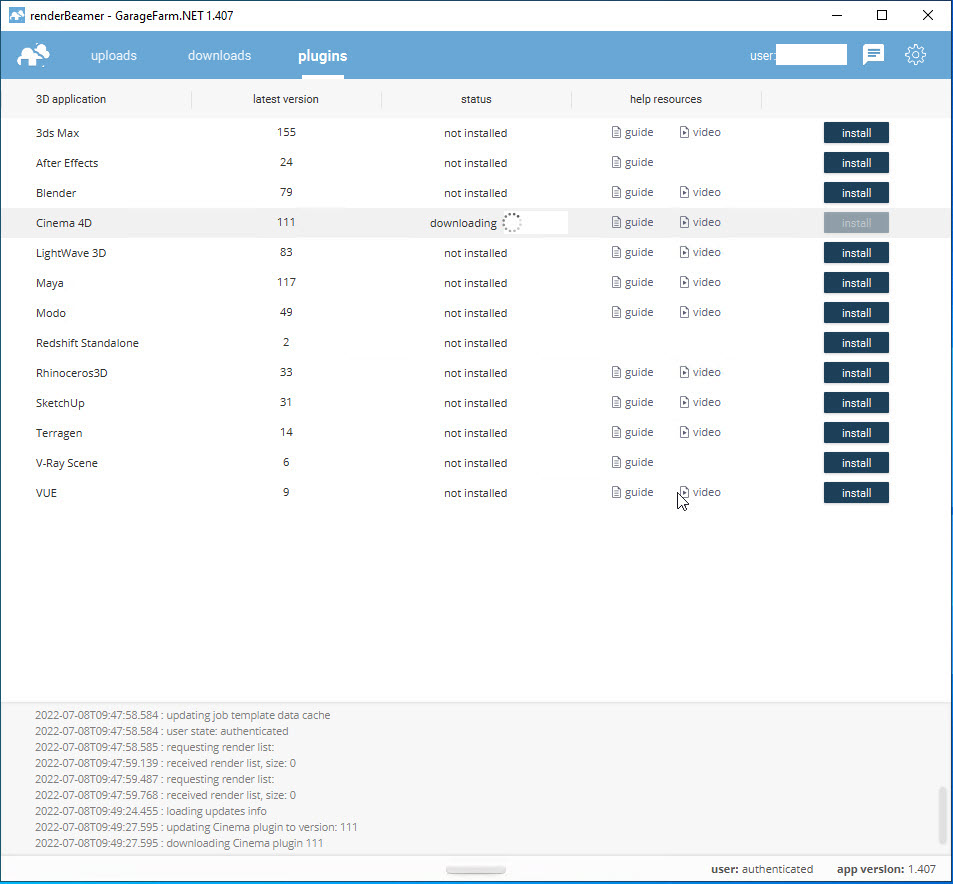
Go to Plugins and install the plugin for your project. Here we will install plugin for Cinema 4D.
2. Upload the project
Open your project in Cinema 4D and we are ready to send it to GarageFarm. Note: renderBeamer must be running (in the background) to upload/download the files.
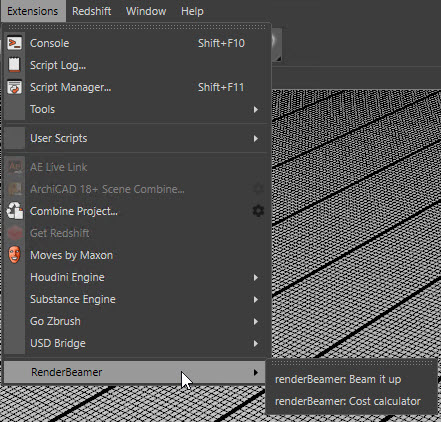
Go to Extensions > RenderBeamer:
> Cost calculator: To estimate the render time and cost
> Beam it up: To send the project to the farm
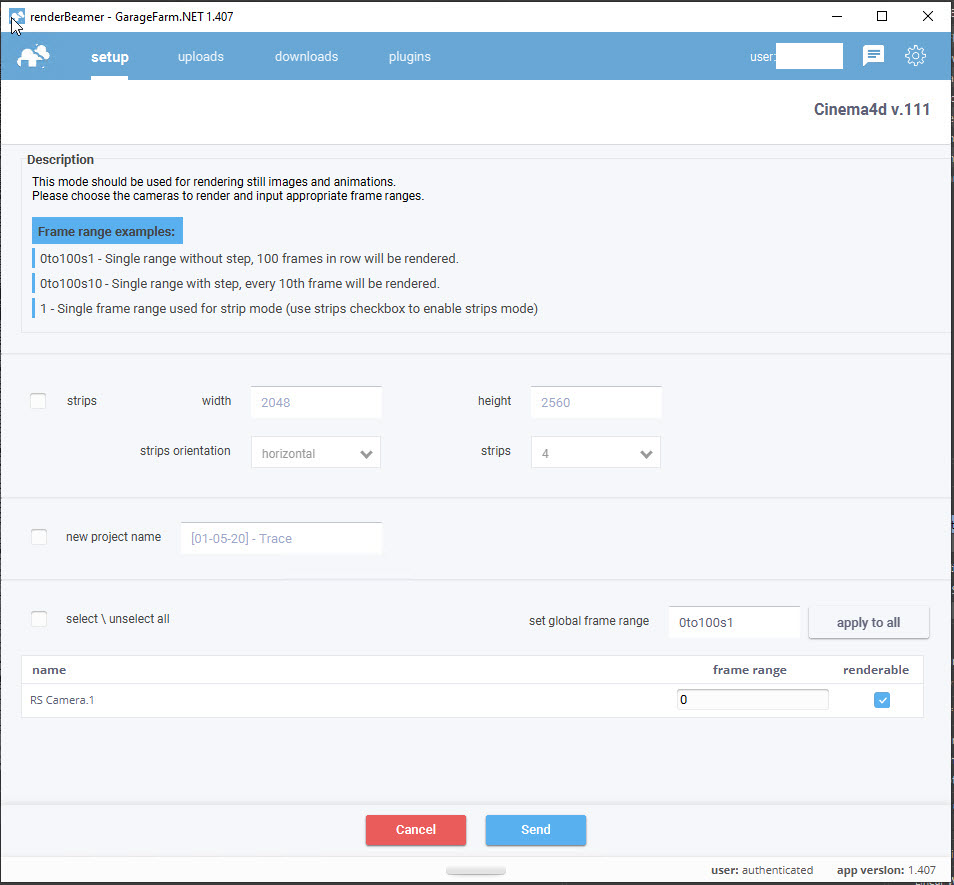
Choose the Setup and Send. Once the project are successfully uploaded, you can either click on the link or go to the Web Manager to continue.
3. Submit the job & monitor render progress
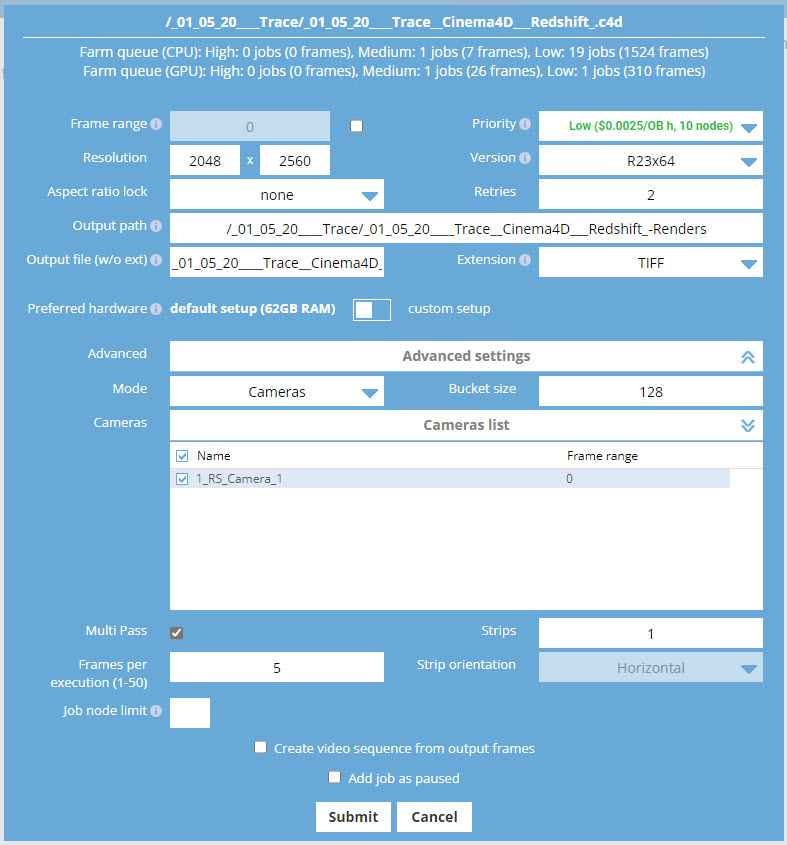
Next step is choosing Render settings and Priority. There are three Priorities: Low, Medium and High (with different number of nodes and price).
| CPU | GPU | |
| Low priority | $0.015 / Ghzh, 75 nodes | $0.0025 / Obh, 10 nodes |
| Medium priority | $0.03 / Ghzh, 150 nodes | $0.0038 / Obh, 25 nodes |
| High priority | $0.06 / Ghzh, 300 nodes | $0.0050 / Obh, 50 nodes |
For Cinema 4D & Redshift, we only need to pay attention to GPU priority. You also can see the information about jobs in queue which helps you to decide which priority to use.
Click Submit to add your job to the render queue. After the project has been rendered, we are able to check the real-time progress as well as monitor the render process.

4. Download the results
When the frames finish rendering, they are automatically download to the default folder selected in renderBeamer app. If you are not sure where that folder is, let’s check it in renderBeamer’s settings or right-click at the result in Download panel.

5. Test results on GarageFarm
We will use a project called “Trace” made and shared by TFMSTYLE.
6. Conclusion
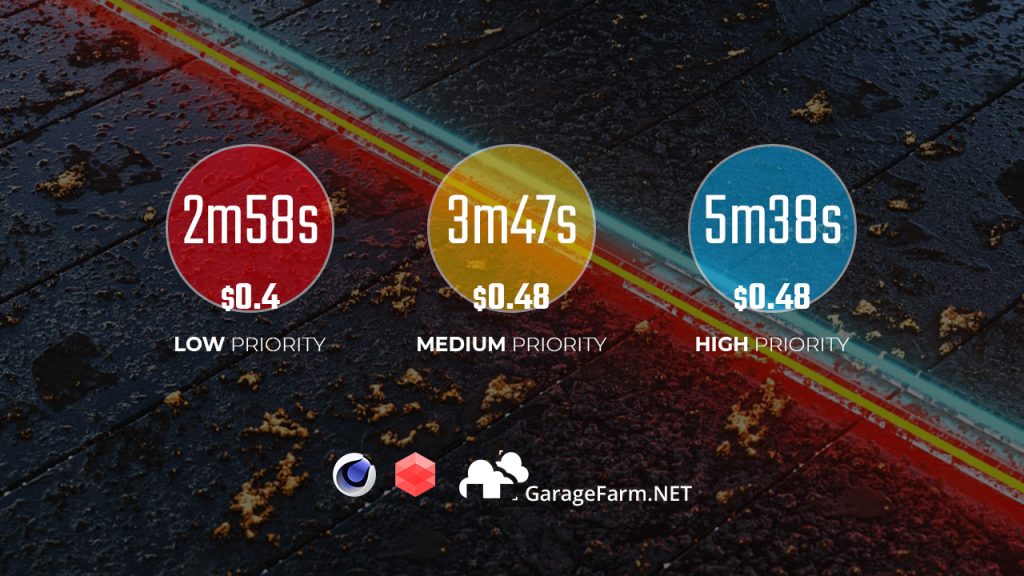
- The workflow to submit and get results from GarageFarm is pretty easy. They have well-documented and detailed instructions to help the very beginners.
- The cost between different priority is not much different, but the Low priority has the fastest render time, which is quite weird. Maybe the reason is that we just use 1 frame.
- This is our detailed instructions for you to have a better understanding. We also test render time and cost between priority options for one same project for reference. It’s better to test your own project by yourself.
If there’s anything you want us to clarify, please leave a comment below.


No comments