


How to Render with Redshift in C4D?
This article will walk you through how to render with Redshift in C4D.
If you are using Cinema 4D, you must have heard of Redshift, a powerful GPU-accelerated render engine known for its speed and high-quality results. Redshift offers a production-proven rendering solution that integrates seamlessly with Cinema 4D’s workflow.
In this guide, we’ll walk you through how to render with Redshift in C4D, step by step. From setting it up properly to using Interactive Preview Rendering and rendering, this article will help you start your creative process in Cinema 4D. So, whether you are just starting out or switching from another render engine, this is a practical starting point to begin rendering confidently with Redshift.
Table of Contents
What is Redshift?
Redshift is a high-performance, production-quality GPU-accelerated renderer designed to deliver fast, noise-free renders without compromising visual quality. What makes Redshift unique is its use of biased rendering techniques, which allow users to fine-tune the balance between speed and quality, ideal for meeting tight deadlines while still achieving stunning results.
With Redshift, artists can get fast rendering performance using just a simple workstation. This means less waiting, fewer hardware limitations, and more time to focus on creativity.
Why Choose Redshift?
Here are some of the key benefits that make Redshift a popular choice:
- Speed: Thanks to GPU acceleration and biased nature, Redshift offers incredibly fast render times even for complex scenes. Artists can balance the performance and quality ratio to meet the needs of their works.
- Photorealistic Quality: Redshift supports advanced shading networks and texture capabilities. This enables artists to create detailed, production-level visuals with realistic lighting, reflections, and materials.
- Real-Time Previews: With Redshift’s RenderView Interactive Preview Region (IPR), you can see your changes in near real-time. This makes tweaking lights, materials, and camera settings a much more intuitive and creative process.
- Compatibility with Leading 3D Applications: Redshift is not limited to Cinema 4D. It also works seamlessly with industry-standard software like Maya, 3ds Max, Blender, Houdini, Katana, and ZBrush, fitting into nearly any production pipeline.
- Tight Integration with Cinema 4D: While Redshift supports multiple platforms, it pairs especially well with Cinema 4D. Since Cinema 4D 2024, Redshift has become the default renderer. And as of September 1st, 2024 onwards, every new or renewed Cinema 4D subscription includes Redshift GPU built-in. That means you do not need to buy a separate license to use Redshift with C4D. Everything’s ready to go out of the box.
Maxon’s strategy clearly encourages artists to use this powerful duo — Cinema 4D + Redshift — for a smoother, more integrated workflow that delivers both speed and quality.
In short, if you are working with Cinema 4D, Redshift is not just an option – it is the smart choice for efficient, high-quality rendering.
How to Render with Redshift in C4D?
Installing and Setting Up Redshift in Cinema 4D
1. Download the Redshift installer
There are two basic ways to download Redshift:
- manually downloading and running the Redshift installer.
- using the Maxon App.
Both ways require the same installation process, but Maxon App has the further advantage of automatically checking to see if there are newer versions of Redshift available than the one presently installed on your PC.
2. Install Redshift in Cinema 4D
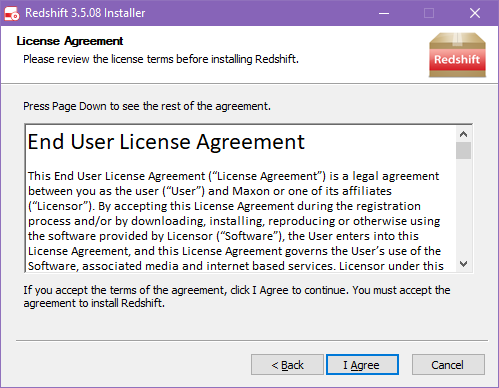
Run the Redshift installer, and follow its guide through the installation process. This is how you install Redshift on Windows.
The first screen is a Welcome page that welcomes you to this installation process.

Next, read and review the Redshift Software License Agreement carefully before continuing.
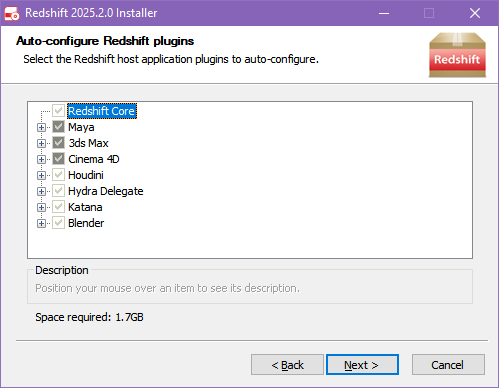
Then, you can select the DCCs for automatic configuration, i.e., Cinema 4D.
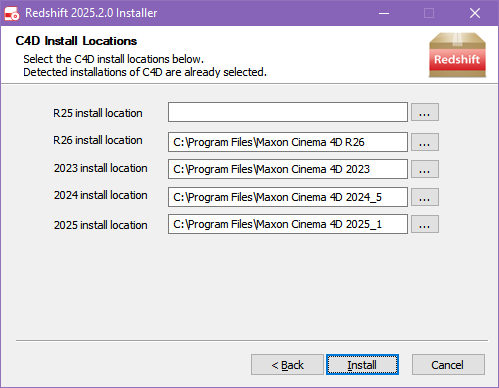
After selecting Cinema 4D for automatic configuration, you can choose the installation location for each C4D release. Each identified version will include the default Cinema 4D install location, which can be changed with a custom install one.
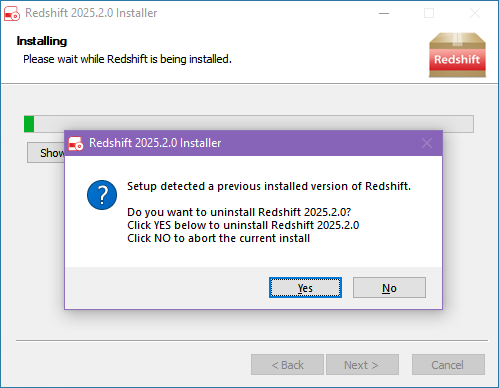
If you are updating from a prior version of Redshift, you will be asked for verification before overwriting the currently installed version. Click Yes to continue with the installation and begin copying files to your PC.
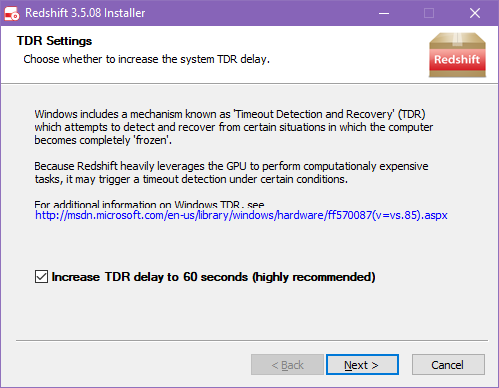
After all files have been copied, you may be asked to change the TDR delay (Timeout Detection and Recovery) setting on your PC. If you do not see this screen, either your system’s TDR delay is already appropriate for Redshift, or the machine does not support TDR.
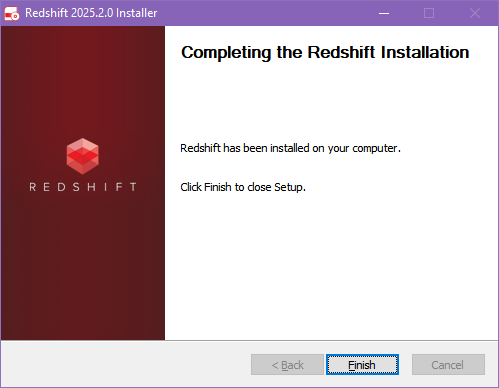
The Redshift installation is now finished. Click Finish to close the installer.
3. Check if Redshift is active in Cinema 4D
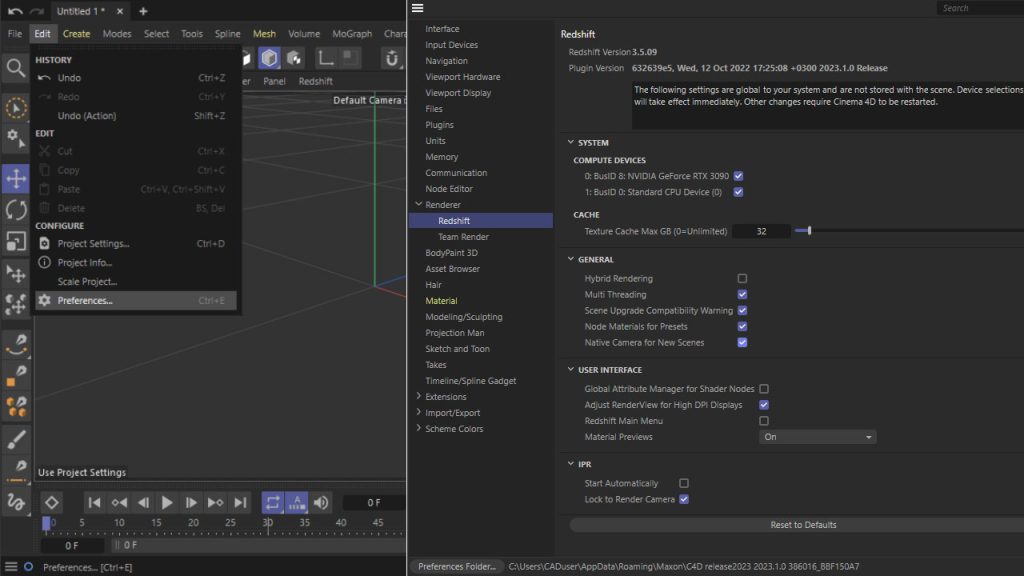
Now let’s check the Redshift Preferences in the Cinema 4D Preferences window to ensure that Redshift is installed appropriately. From Cinema 4D’s Edit menu, choose Preferences….
After being selected, the Redshift Preferences appear in Cinema 4D Preferences’ Renderer category. In the About category, you can also discover the Redshift installed version number.
4. Set Redshift as the default renderer
Since Cinema 4D 2024, Redshift has been the default renderer, and you do not need to do anything. However, if you are using an older version, you can tell Cinema 4D to use Redshift as the current renderer as follows.
To access the Render Settings window, pick Render from the Cinema 4D menu bar and then Edit Render Settings… Next, choose Redshift from the Renderer selection drop-down box in the Render Settings window.
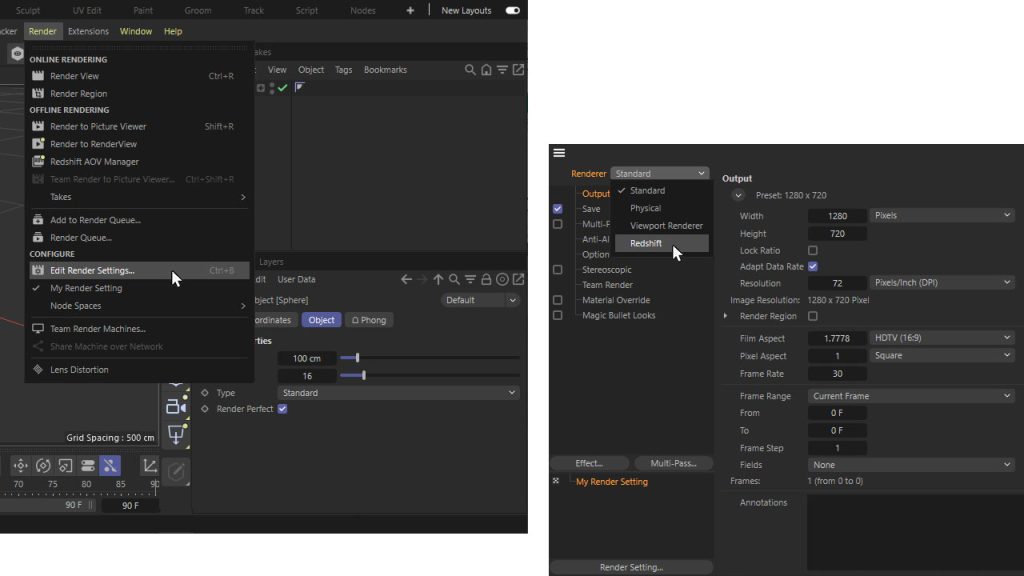
The Redshift entry can now be selected from the left side of the Renderer Settings window. This will show the Redshift render options for our scene.
Preparing Your Scene for Redshift
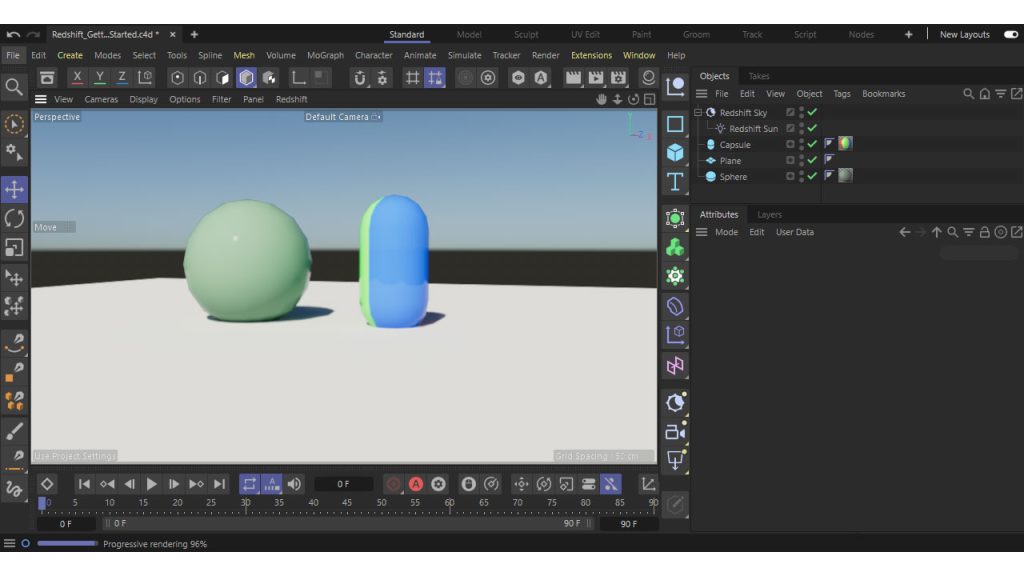
Let’s make a scene for rendering in Redshift. Create an object, make things more interesting by adding materials and textures. Then make things more dramatic by adding lights and cameras.
Rendering Your Scene
When all is set, let’s render our scene. From the Render menu in the main menu, we choose Render View to render our scene in the viewport.
- Real-time feedback with Redshift IPR
However, editing the scene and clicking “Render” every time is not just inefficient, but also slow for complex scenes. It would be better if we could get immediate feedback on our scene without interrupting our flow.
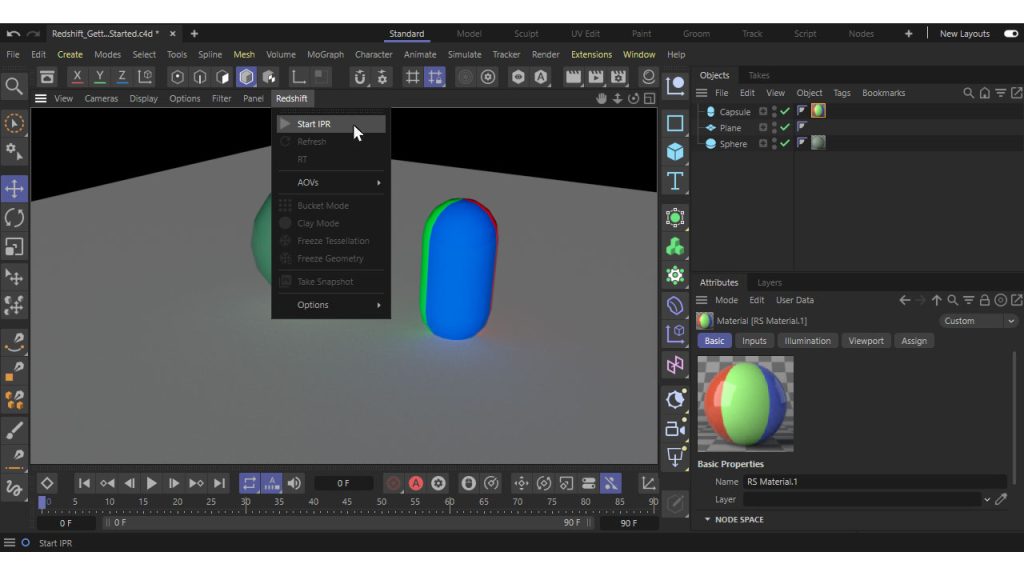
Redshift has this real-time feedback feature, which allows us to engage interactive rendering right in your viewport via the Redshift menu. To have the interactive preview in a separate window, open the Redshift RenderView from the Cinema 4D Window menu and click the ▶ button to start rendering.
Final thoughts
Rendering with Redshift in Cinema 4D offers efficiency, flexibility, and quality for 3D artists. Thanks to its tight integration with C4D and its GPU-based rendering engine, Redshift allows you to achieve stunning visual results while significantly cutting down on render times.
By understanding how to render with Redshift in C4D, you are equipped with the basics of Redshift to deliver professional renders with ease. Don’t be afraid to experiment! The real-time feedback from Redshift’s IPR (Interactive Preview Rendering) makes it easy to iterate and improve.
FAQ: How to Render with Redshift in C4D?
1. Can I use Redshift on Mac?
Yes, you can! Redshift is compatible with most modern operating systems, including Windows, Linux, and macOS. It supports a range of GPUs from NVIDIA and AMD. So whether you are on a Mac, Redshift fits into your workflow.
2. Is Redshift included in my Cinema 4D license?
Yes. As of September 1st, 2024, all new purchases or renewals of Cinema 4D subscriptions come with Redshift GPU included. That means there is no need to purchase a separate Redshift license to render Redshift with C4D.
3. What are the hardware requirements for Redshift?
To run Redshift smoothly, here’s what you’ll need at minimum:
- 16 GB RAM
- 64-bit CPU
- A GPU with 8 GB or more VRAM: NVIDIA GPU with CUDA compute capability 5.0 or higher; AMD GPU with RDNA 2 or newer architecture.
While these are minimum specs, better hardware will result in significantly faster renders and smoother performance, especially for high-resolution or complex scenes.
4. How do I fix slow renders in Redshift?
Slow rendering can happen for several reasons, including weak hardware, enabled hybrid rendering (CPU + GPU), memory limitations, driver issues, and more. Here are a few practical solutions you can take:
- Update to the latest NVIDIA Studio Driver
- Optimize your Redshift render settings
- Disable hybrid rendering
- Turn hardware acceleration on or off depending on your system
- Upgrade your GPU or increase RAM if needed
If you’ve tried these steps and still experience slow performance, you can open a support ticket with Maxon for assistance from the Redshift development team.
See more:


No comments