


Fox render farm workflow for Blender and Cycles
This article is dedicated to Blender and Cycles rendering using Fox render farm. We will not explain to you about the software or the render farm, as it is clear for all of us. We will try to focus only on the Fox render farm workflow and how you should start rendering your project on this render farm. Let’s start.
1. Set up files for rendering
First of all, you should go to the Fox render farm website and register an account. Just click “Register” on top of the screen, they will lead you to the signing up page. After creating an account, you will receive a verification email. Make sure you click their link to verify the account to be able to login after that.
Now when you have an account, you should come back to the Fox website and go to your account page. They will have all steps on the left side of the screen. You should click and follow them. We will demonstrate them below.
2. Submit your project to render
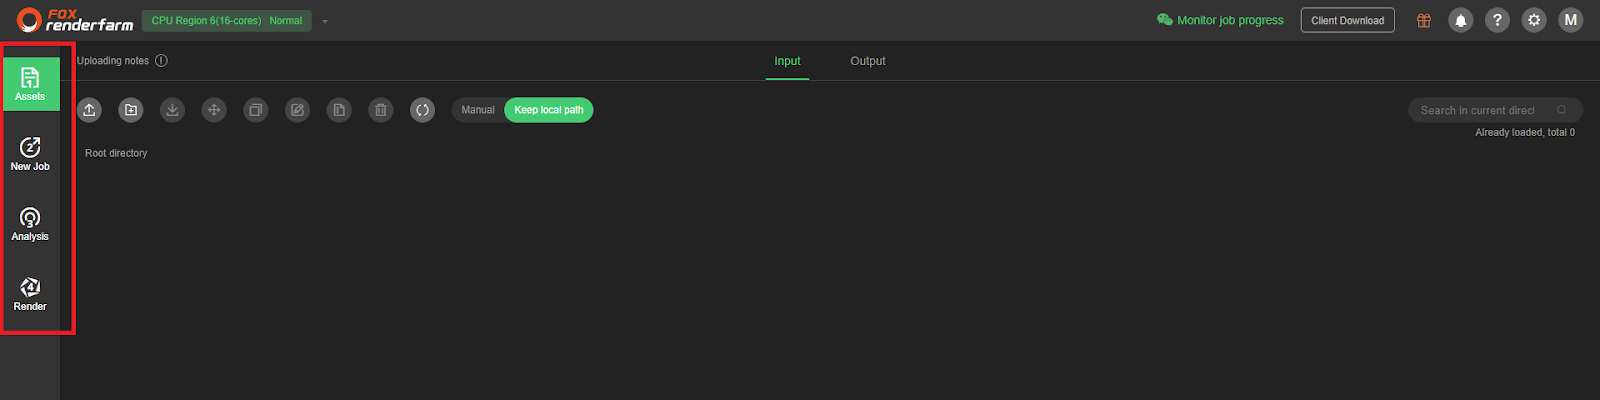
In our article, we suppose that you have a project ready. We used PartyTug 6:00AM from Blender demo files. Now you have an account, you should click Assets > Upload file

It will require you to download an application which is Raysync to upload the file. After you complete the installation, refresh the browser page to start high-speed transmission. You continue to click Upload file, and it will transfer your project to the web at a very high speed (we uploaded 42MB in about 2-3 seconds, really impressive).

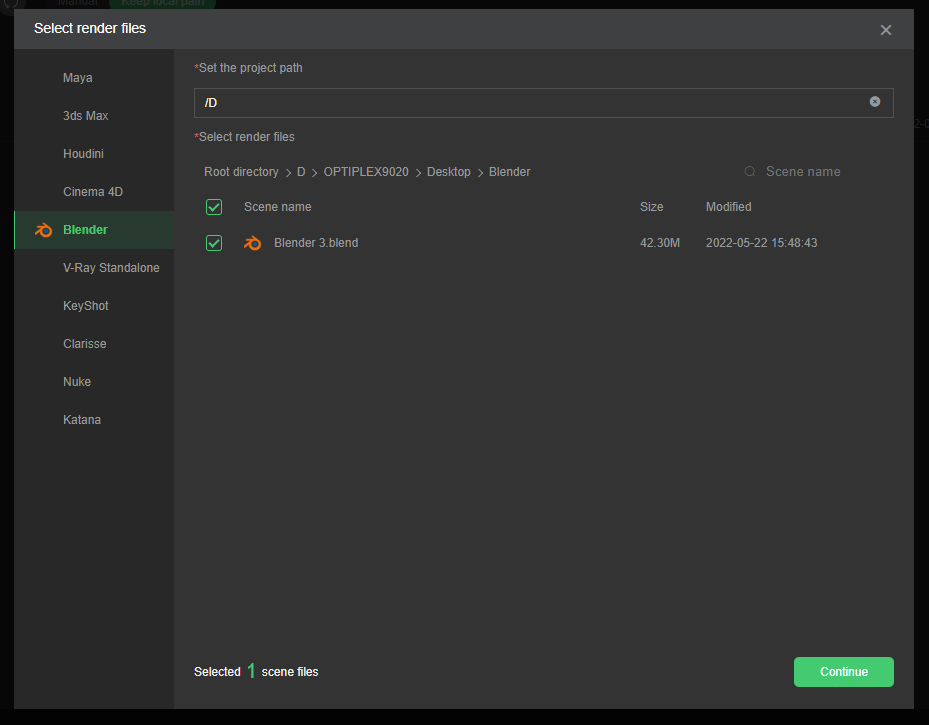
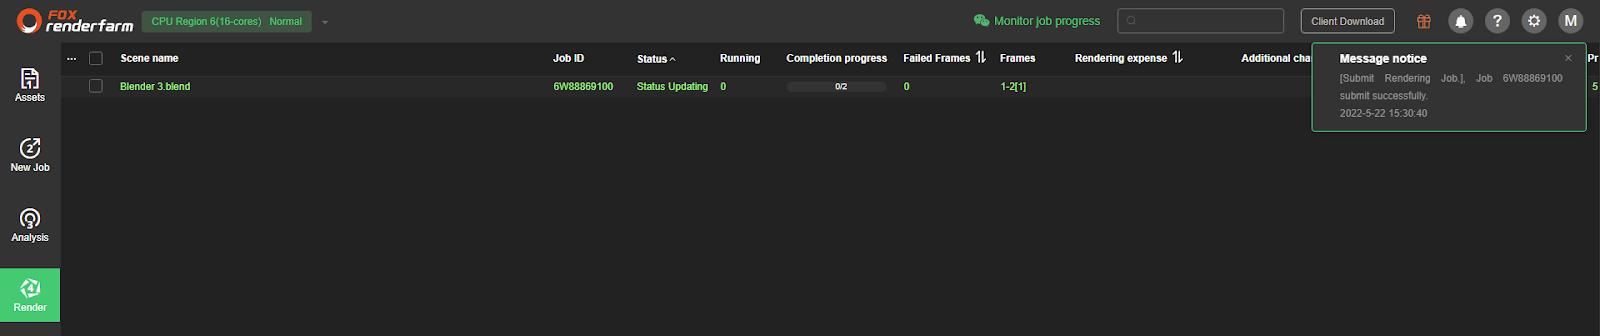
After uploading, you click New Job to submit your job. They will have a Select render file window, you just open the folder and choose the file which you want to render.
Next, you click Continue, then it will lead you to a new window where you can select render software, Hardware configuration, Analysis setting.
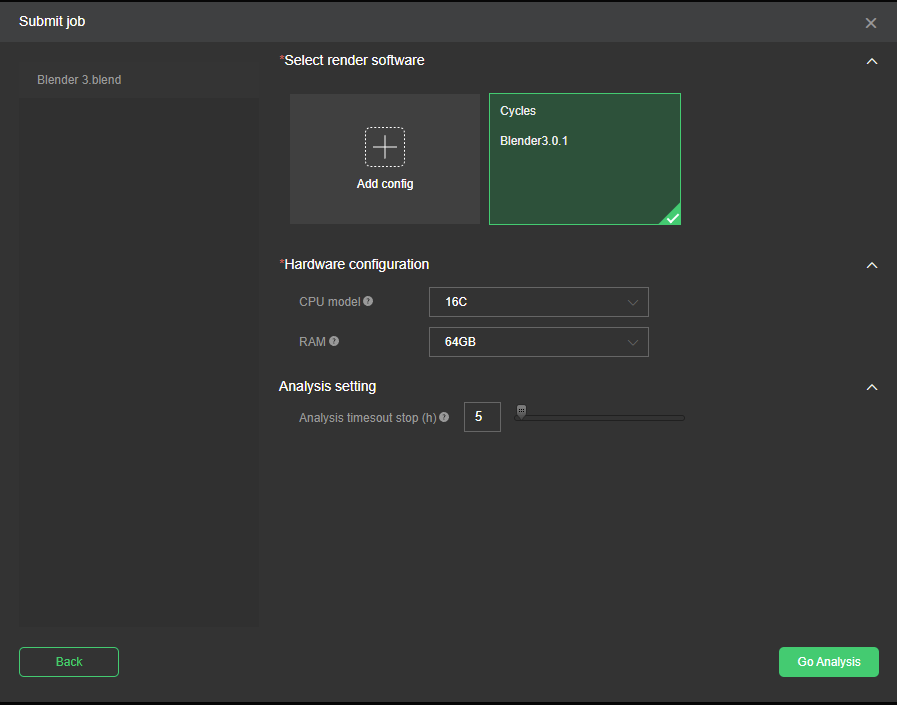
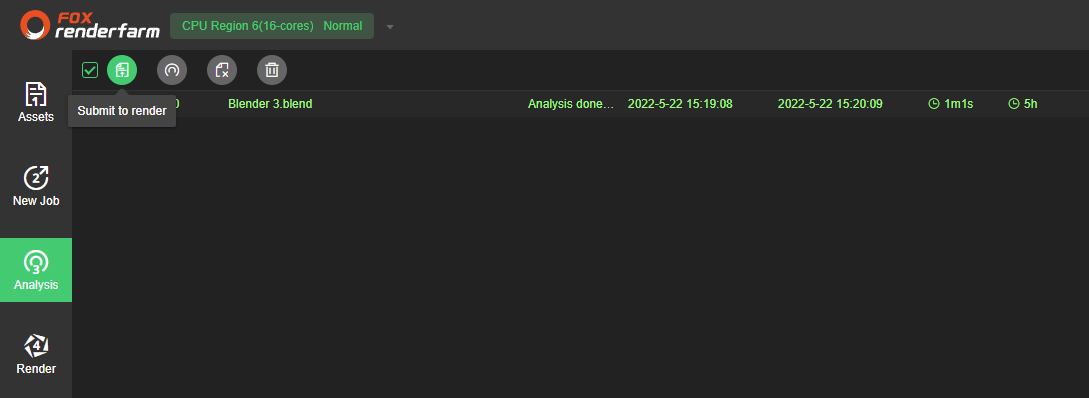
After selecting, you click Go Analysis. It will analyze the scene and will not take so much time. Now that it’s done, you select the file, and click Submit to render.
You submit the job, they will have some final checking for you, and warn you. You should read them carefully and make some changes if needed. Or you just click Ignore and Continue > Submit.
The job is submitted and proceed to render. We tried 2 frames first.
This is the result for our test project:

Sample: 200
Noise threshold: 01000
Number of frame: 400
CPU node:
CPU Region 6 (16-cores): 7min53s/ frame (it costs USD 0.126/ frame, so a total 400 frames will be USD 50.4)
CPU Region 9: 7min14s/ frame (it costs USD 0.156/ frame, so a total 400 frames will be USD 62.4)
CPU Region 10 (24-cores): 5min1s/ frame (it costs USD 0.108/ frame, so a total 400 frames will be USD 43.2)
CPU Region 11 (16-cores): 9min57s/ frame (it costs USD 0.159/ frame, so a total 400 frames will be USD 63.6)
GPU node:
GPU Region 1(General): 11min52s/ frame (it costs USD 0.3955/ frame, so a total 400 frames will be USD 158.2)
GPU Region 12: unknown. We cannot test it.
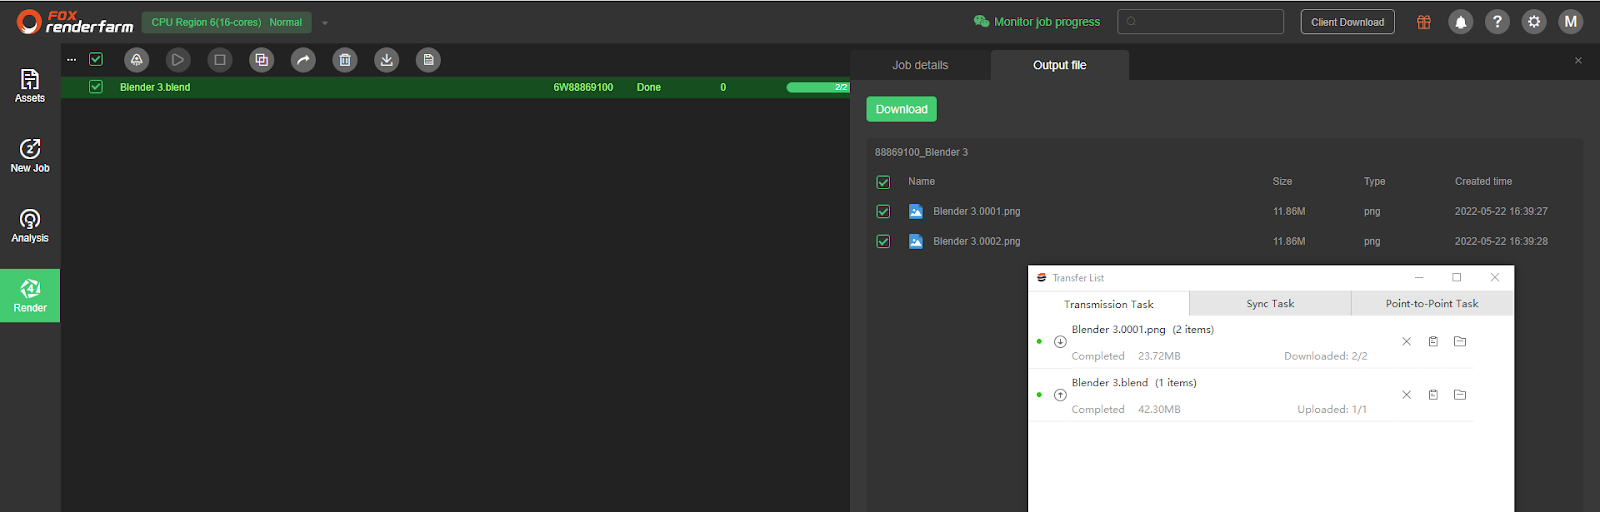
3. Take the results
When you finish rendering, you click the file and it will lead you to a window where you can see Job details and Output file. Click Output file and download what you need. It will download your files through the app Raysync for you (it’s really fast). Then you open the folder where it downloads and take your files.
4. Conclusion and notes
After testing Blender and Cycles with Fox render farm, we come to some conclusions and notes for you:
- It’s web-based, so you don’t need to open your software and download their app to integrate it to the software.
- The CPU region 10 is the fastest in rendering. It also costs the least.
- Interestingly, the GPU is quite slow when you compare to CPU rendering. We just tried the default or standard one for demonstration. We would suggest you try other options if you have time.
- They have notes for users who have not logged in for the last 20 days, that all assets will be cleared after 20 days. You should download the output image in time because they will be automatically cleared after 20 days since the job ends.
- After the account arrears status lasts for 20 days, it will be deemed that you have voluntarily given up the cloud rendering asset storage data.
- If you have special storage requirements, you should contact their online customer service.
- This is just our workflow for you to have a better understanding. We try to make it simple and short but still have enough information so that you can follow. We also put testing time and change it to credits, you can take that as a reference to decide by yourself.
If there’s anything you want us to clarify about Fox render farm workflow for Blender and Cycles. If you have any question for VFX Rendering, please leave a comment.
See more articles in this way:


No comments