Garage workflow for Blender and Cycles rendering
This article is dedicated for Blender and Cycles rendering using Garage farm. We will not explain to you about the software or the render farm, as it is clear for all of us. We will try to focus only on the Garage workflow and how you should start rendering your project on Garage.
Let’s get started.
1. Set up Garage software for rendering
First of all, you should go to the Garage farm website and register an account. Just click “Sign up” on the top right of the screen. After creating an account, a verification email will be sent to you. Make sure you click their link to verify the account to be able to login after that.
Now when you have an account, you should come back to Garage website and download their renderBeamer app.

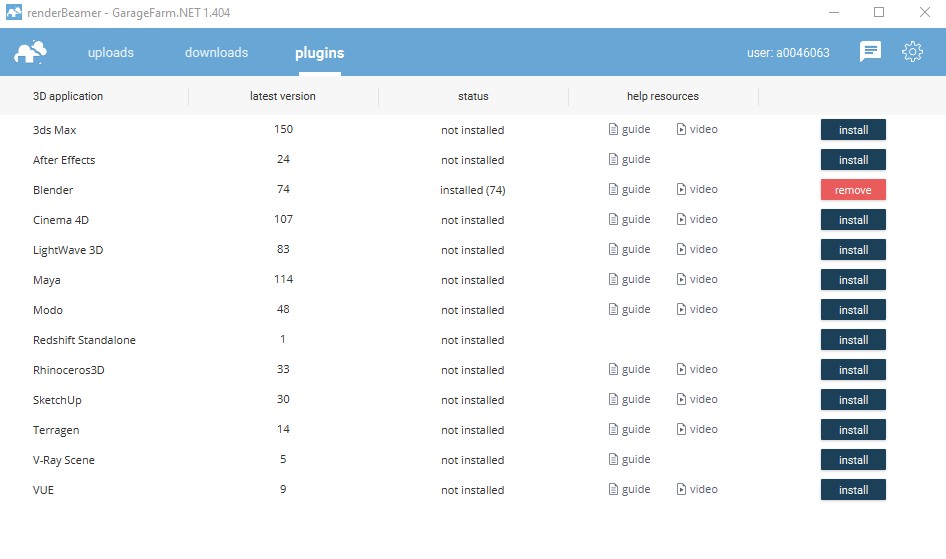
After downloading, you can install the app and run it. Login the app by your Garage’s account, then find the plugins for Blender to install.
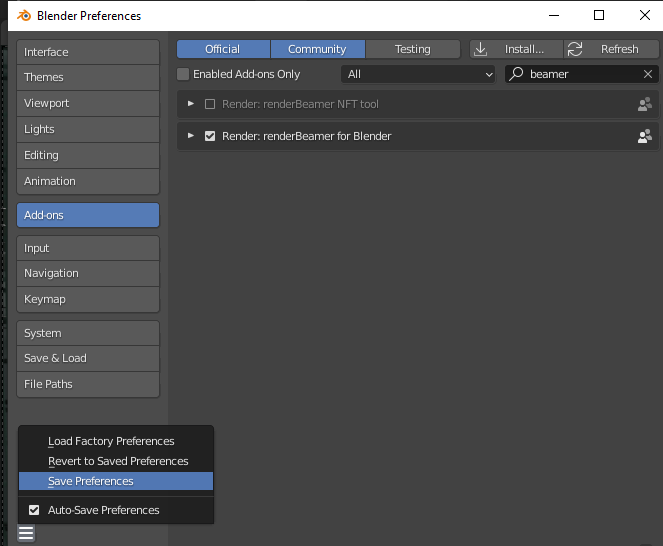
Then you open Blender, go to Edit > Preferences > Add-ons > search for “renderBeamer for Blender”. You select the box, and click Save Preferences
Now you should restart Blender. Then you will see “renderBeamer” in the bottom of the Render menu dropdown.
2. Submit your project to render
In our article, we suppose that you have a project ready. We used PartyTug 6:00AM from Blender demo files. Now you have the app integrated, you should submit your job. Click Render > renderBeamer.
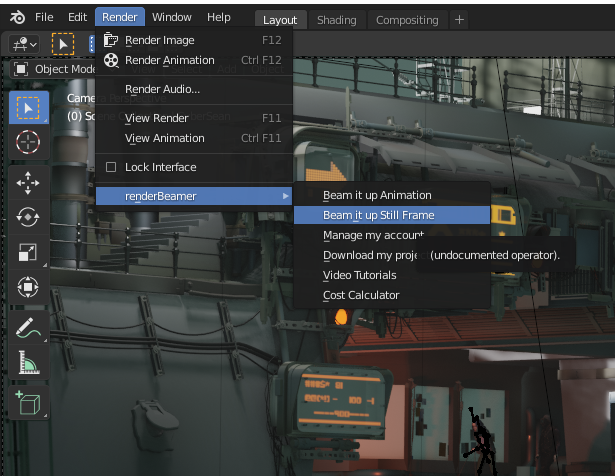
You can beam it up as Animation or Still Frame. Here we tested Still frame.
After the project is fully loaded, you will see a pop-up like this, where it has a submission link for you to send your job:
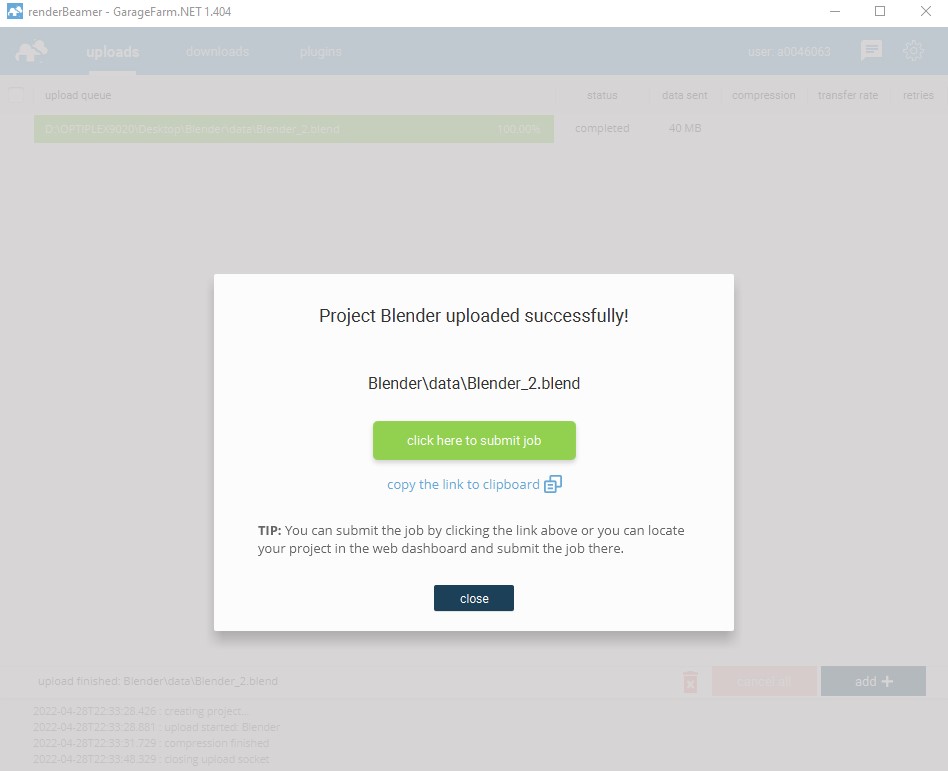
You submit your job, and then set up the render settings and choose the priorities. You hit Submit to add your job to the farm queue and wait (you can see the current queue on top and make a decision which priorities to choose).
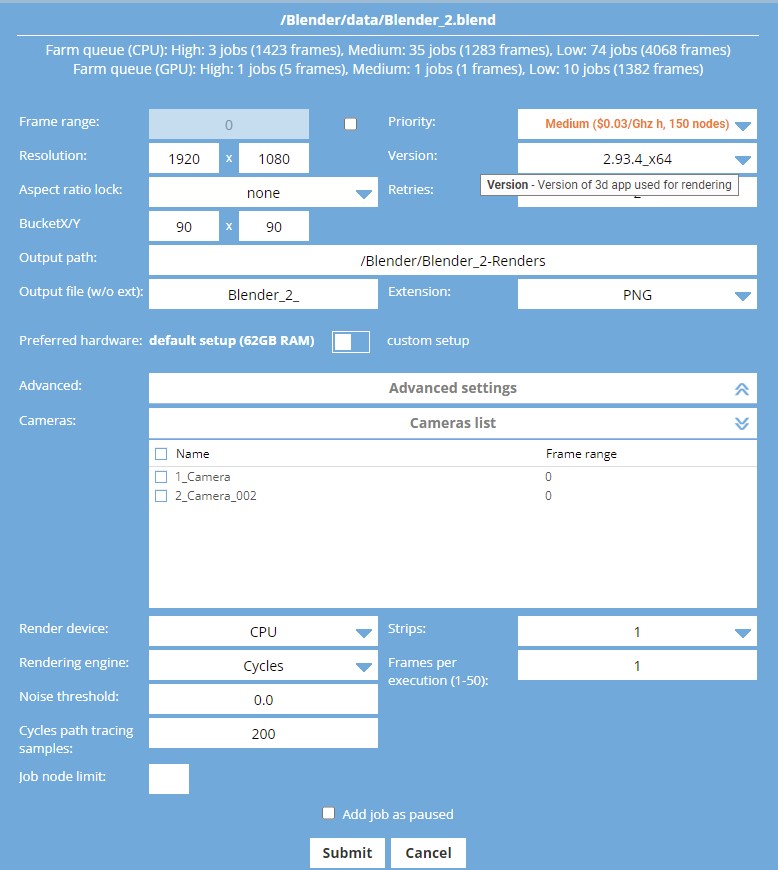
This is the result for our test project using CPU:
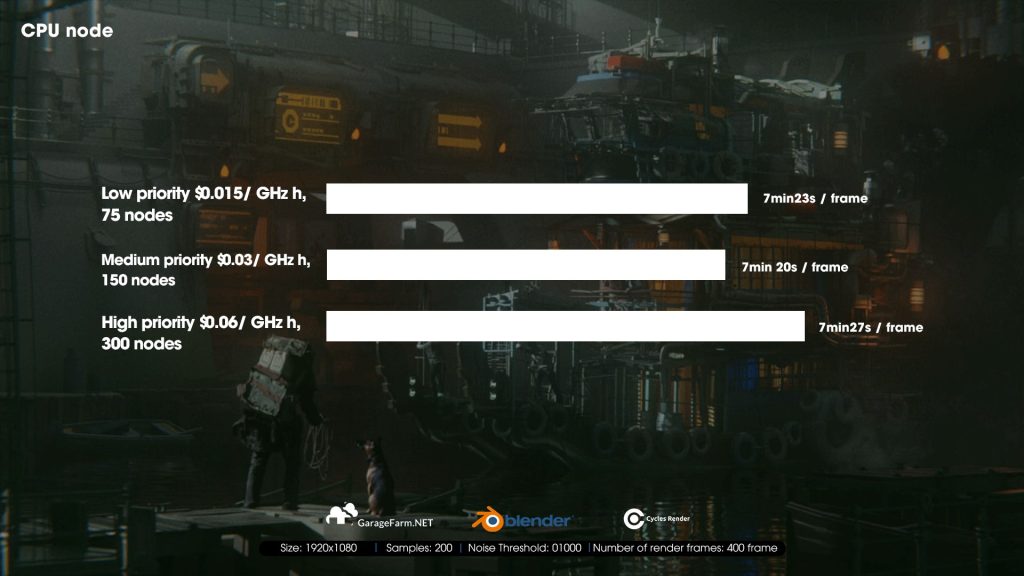
Low priority $0.015/ GHz h, 75 nodes: 7min23s / frame (USD 0.07/ frame so total 400 frames will be USD 28)
Medium priority $0.03/ GHz h, 150 nodes: 7min 20s / frame (USD 0.14/ frame so total 400 frames will be USD 56)
High priority $0.06/ GHz h, 300 nodes: 7min27s / frame (USD 0.06/ frame so total 400 frames will be USD 24)
This is the result for our test project using GPU:
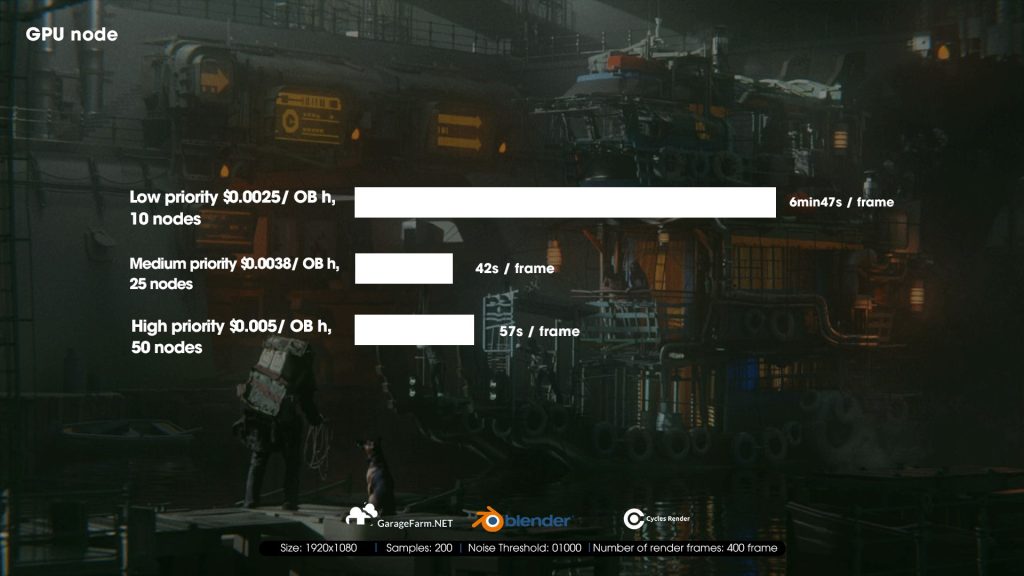
Low priority $0.0025/ OB h, 10 nodes: 6min47s / frame (USD 0.38/ frame so total 400 frames will be USD 152)
Medium priority $0.0038/ OB h, 25 nodes: 42s / frame (USD 0.06/ frame so total 400 frames will be USD 24)
High priority $0.005/ OB h, 50 nodes: 57s / frame (USD 0.10/ frame so total 400 frames will be USD 40)
3. Take the results Garage workflow
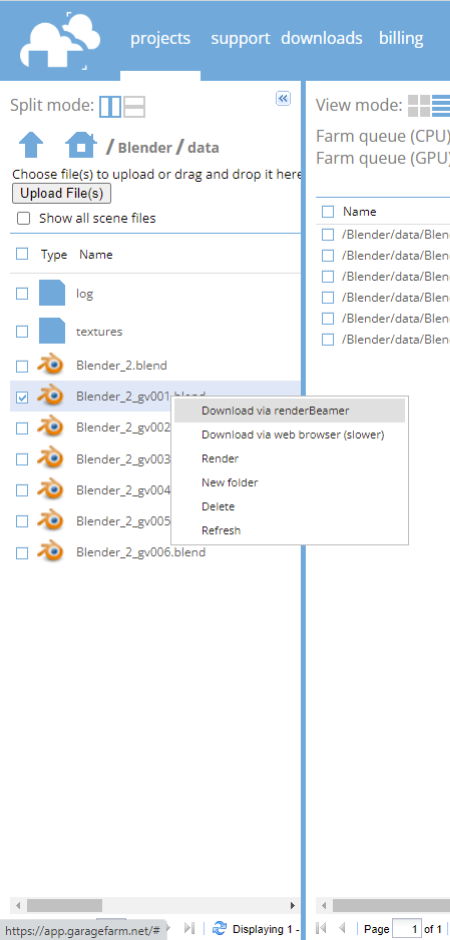
When you finish rendering, you can right click the file on the left of the web interface when you login your account. It will download your files to a folder (there will be notification about that). After it’s done, you can come to that folder and see your files.
4. Conclusion and notes
After testing Garage workflow for Blender and Cycles, we come to some conclusions and notes for you:
- Once you click Submit and have your scene queued, you can close Blender or work on another project. It doesn’t require you to stay connected.
- The GPU node is definitely faster than the CPU node. But the price is higher.
- Interestingly, the Medium priority of both CPU and GPU nodes is the fastest in rendering. With GPU, it’s also the lowest in price, while with CPU it’s the highest.
- Queue time depends on the availability of their nodes. We have tried when there’s not many jobs on their farm queue (about less than 3 jobs), and time for queuing was less than 10 minutes.
- This is just our workflow for you to have a better understanding. We try to make it simple and short but still have enough information so that you can follow. We also put testing time and change it to credits, you can take that as a reference to decide by yourself.
If there’s anything you want us to clarify, please leave a comment.
See more:








No comments