


How to render out multi-pass sequence in Cinema 4D and Redshift?
If you ever wonder how to achieve greater control over your final output in Cinema 4D and Redshift, try setting up multi-pass rendering. It helps you manipulate elements like color, lighting, and shadows independently after rendering, saves you time, and makes you work more efficiently. Today, let’s elaborate more about it and how to render out a multi-pass sequence in Cinema 4D and Redshift.
Table of Contents
What is Multi-Pass Rendering?
Multi-pass rendering is a method to isolate aspects of our overall image, such as shadows, reflections, depth, and object masks, into distinct render passes.
Why do we need to separate these elements? Because it helps us make precise adjustments to specific components of the image. You will not need to re-render the entire scene, which is time-consuming and tiring, but you will be able to combine and adjust in post-production software easily.
Some key benefits of Multi-Pass Rendering
More control:
Each render aspect in your scene, such as diffuse color, specular highlights, reflections, or shadows, is rendered as a separate image. By splitting it up into different passes, you now have more control to add in some compositing polish inside After Effects or Nuke.
More precise adjustments:
Because you have broken down your rendered image into discrete parts, it’s very easy to edit each of them without affecting the other parts of the image, such as modifying the brightness of shadows, changing the color of reflections, or adjusting the intensity of highlights.
Efficient workflow:
Rendering all passes or channels in a single render image and combining them in post later is more time-saving than rendering multiple versions of the scene. You don’t need to make many full renders, and it speeds up your workflow.
Iterative design:
Because you can adjust the scene as you wish without having to go back to Cinema 4D and re-render, it’s excellent for trying out new looks. No re-rendering also means that your response to client revisions is much faster, enabling you to iterate or explore personal creativity.
Instruction to render out multi-pass sequence in Cinema 4D and Redshift
To render a multi-pass sequence in Cinema 4D with Redshift, you should follow these steps:
Enable Multi-Pass in the render settings:
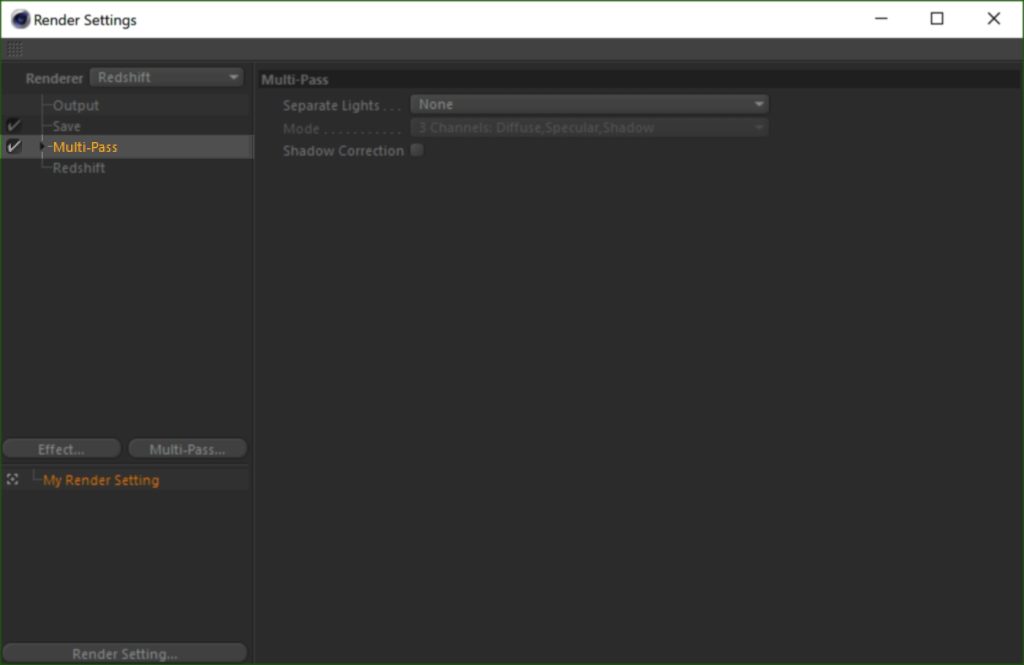
- Open your Render Settings (Ctrl+B or Cmd+B).
- Navigate to the Multi-Pass tab and check the box to enable it.
Add multi-passes (AOVs):
- You can add various passes by clicking the Multi-pass button > selecting from the list, or add them all.
- Commonly used passes include:
Diffuse: Captures only the color information of your objects without any lighting or shading.
Specular: Separates the specular highlights from your scene.
Shadow: Isolates the shadows cast in your scene.
Reflection: Captures the reflections on your objects.
Ambient Occlusion: Provides a pass that highlights the contact shadows and ambient occlusion in your scene.
Define save path:
- Go to the Save tab in the main Cinema 4D Render Settings.
- Define a save path and file name in File…. for the main image.
- Remember to check the “Multi-Pass Image” and give it a separate save path and file name in the File for the multi-pass layers.
- In both Regular Image and Multi-Pass Image, select the file format OpenEXR to ensure all layers are saved within a single file.
- Depth could be set to 32-bit for maximum dynamic range, especially for highlights.
- You can select “Multi-Layer File” within the OpenEXR settings to contain all AOVs in one EXR sequence.
Render the Sequence:
- After all multi-pass settings are done, you can start to render by clicking the Render to Picture Viewer button. Cinema 4D and Redshift will generate each frame, saving the specified passes for you to make modifications later in your post-production software.
Wrap up
To conclude, rendering a multi-pass sequence in Cinema 4D using Redshift offers a range of powerful benefits, including greater control over individual elements, more flexibility during post-production, and a significantly more efficient workflow. The article has walked through the step-by-step process of setting up and rendering multi-pass sequences. Hope it helps both new and experienced users to harness the full potential of this advanced rendering technique.
See more:

No comments