


How to render a Cinema 4D & Physical renderer project on Ranch Computing
After Cinema 4D & Redshift, we will move to render Cinema 4D & Physical renderer on Ranch Computing. Let’s explore the workflow and speed.

1. Set up RANCHecker and RANCHsync
The steps for rendering any software on Ranch Computing is the same. You guys can refer to Cinema 4D & Redshift workflow for the most detailed instruction.
First, you will need to download the RANCHecker for Cinema 4D. Extract the archive and copy the folder to destination: CINEMA 4D R… > Plugins. After that, RANCHecker is integrated into the software. Find it in Cinema 4D > Extensions.

Enter your API key (which could be found in your Ranch profile) to log in. Next, install RANCHsync. This is a tool to upload/download the project to/from the farm.
2. Submit job and download the results
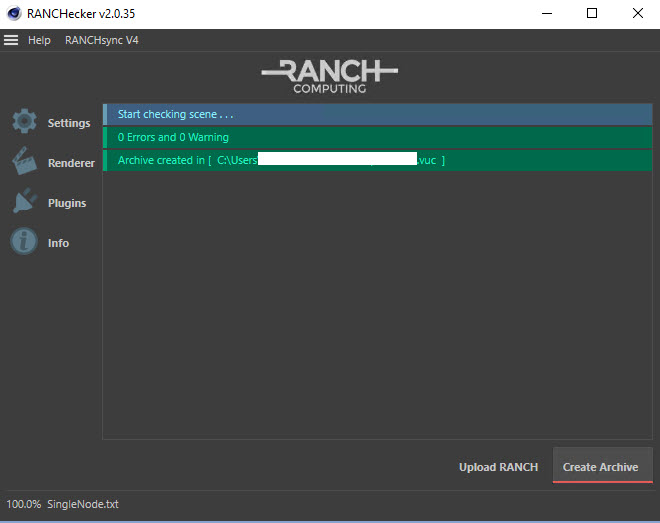
Now both RANCHecker and RANCHsync are ready, click Create Archive to submit the job. The plugin will check the scene and give warning, error if any, then upload project to the farm through RANCHsync.
Don’t forget to check the Priority and other render settings in RANCHsync before submitting.
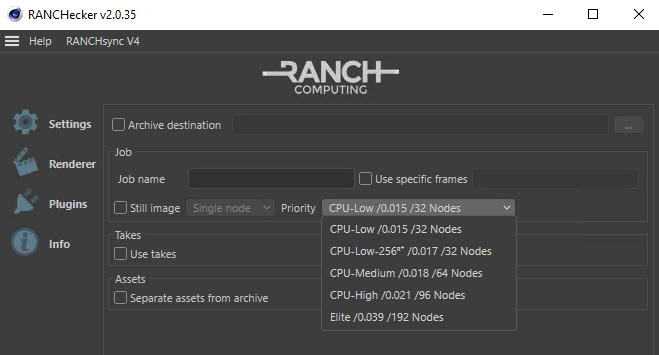
CPU Priority
- CPU-Low: €0.015 / GHzh, 32 nodes
- CPU-Low-256: €0.017 / GHzh, 32 nodes
- CPU-Medium: €0.018 / GHzh, 64 nodes
- CPU-High: €0.021 / GHzh, 96 nodes
- CPU-Elite: €0.039 / GHzh, 192 nodes
Note:
- File name is no longer than 20 characters.
- You can use Cloudflare (in your Ranch account settings) for faster speed, if you are far away from Paris.
After uploading, the project will be immediately put in queue and wait its turn to render according to chosen priority. Ranch users are able to monitor the process in Web manager. The rendered frames can be either downloaded automatically to the destination folder in their local computer or downloaded manually (web/FTP download).
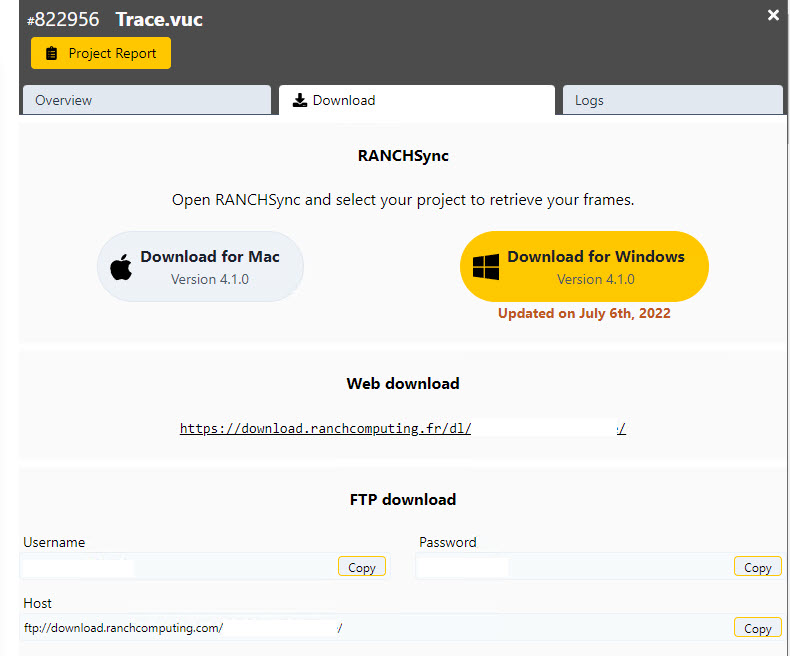
Interestingly, Ranch provide a project report with full information about the submitted job, after each job is done.
3. Test results on Ranch Computing
We will use a project called “Section” made and shared by TFMSTYLE.
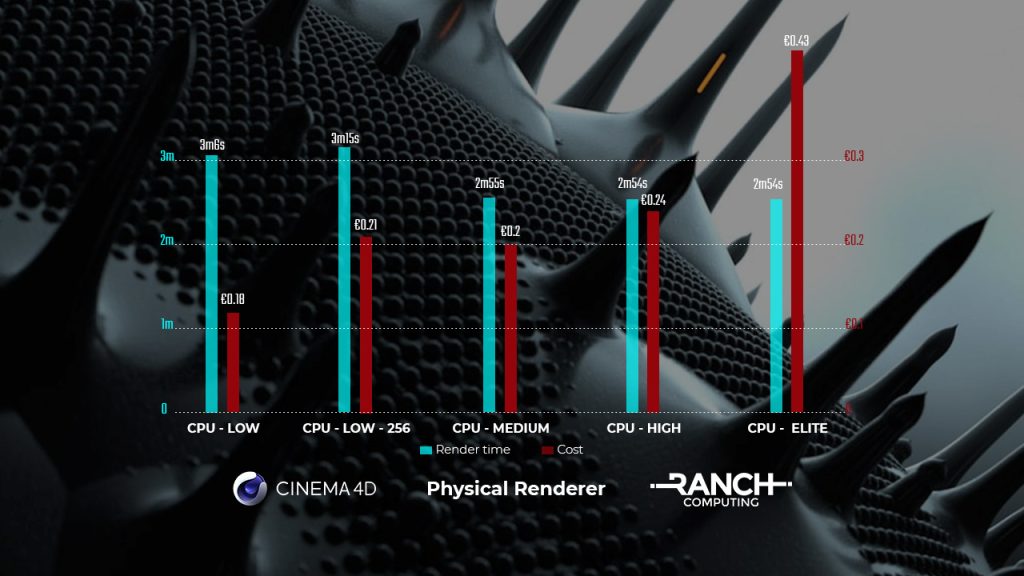
4. Conclusion
- CPU-Low priority has the lowest cost but takes longest time to render. CPU-Medium, CPU-High and CPU-Elite have the fastest render time. But the cost of CPU-Elite is twice as expensive as Medium and High. We think that Elite priority is more suitable for more complex, heavy projects, while Medium priority is best in terms of cost and time for most of projects.
- This is our detailed instructions for you to have a better understanding. We also test render time and cost between priority options for one same project for reference. It’s better to test your own project by yourself.
If there’s anything you want us to clarify, please leave a comment below.
See more: Best render farm service


No comments