


How to render a Cinema 4D & Redshift project on Ranch Computing
Maxon Cinema 4D & Redshift make an outstanding pair for a fast, professional rendering. Numerous render farms support these two software. Explore how to render a Cinema 4D & Redshift project on Ranch Computing in detail today. Let’s get started with VFX Rendering.
Table of Contents
1. Create an account and setup RANCHecher
First, go to Ranch Computing and create an account. Choose your software (for this project, Cinema 4D) and download the RANCHecker for it. You can see the render engine and plugin versions available. Make sure your 3D packages are supported before continuing. In addition, they offer the document and tutorial video for your specific software, you should refer to it to start more smoothly.
After extracting the archive, copy the whole folder to CINEMA 4D R… > Plugins.
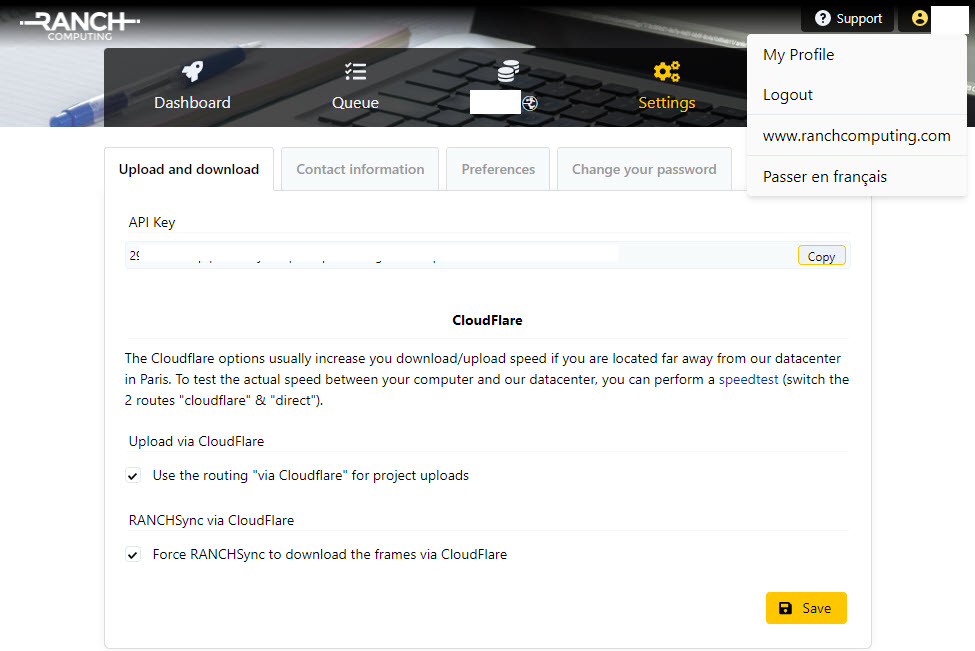
Open Cinema 4D and go to Extensions > RANCHecker. In the 1st time, you have to enter your API key to log in. API key can be found in “My profile”.
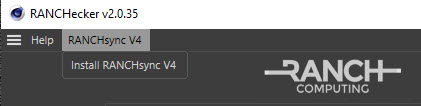
Next step is installing RANCHsync. This tool will upload the project collected by RANCHecker to the farm.
2. Submit the project & monitor render progress
Before Create Archive (Upload the project), don’t forget to check:
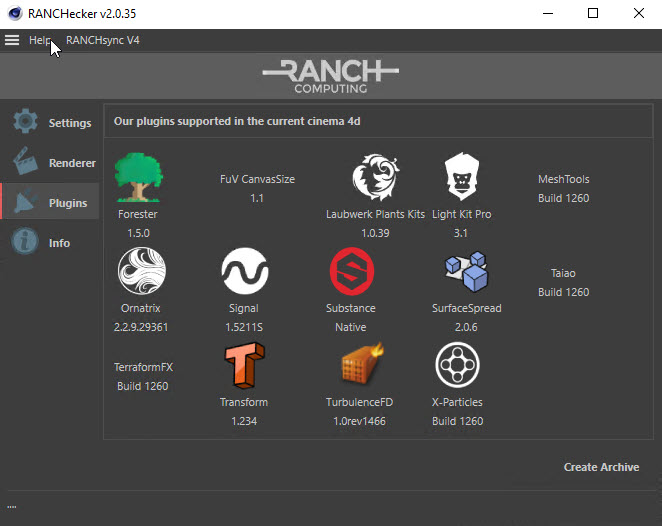
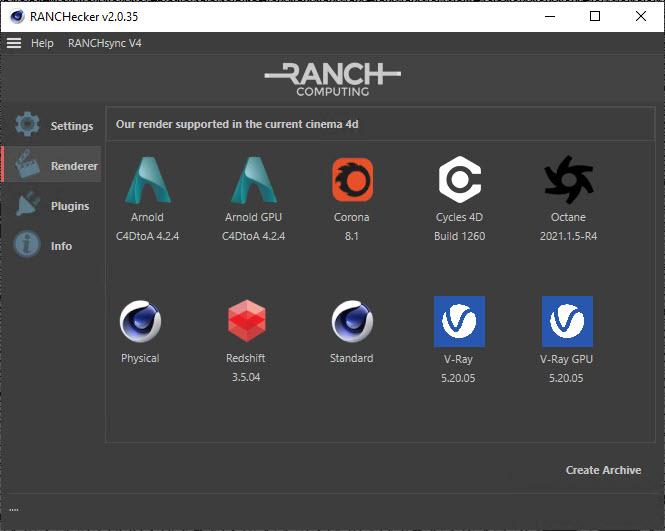
> Info: General information.
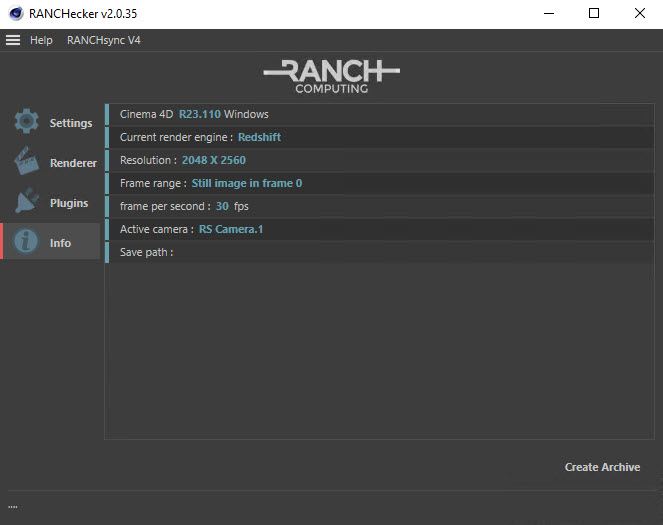
> Renderer & Plugins: All the plugins and rendering engines with the version number Ranch support.
> Settings: Priority and other settings.

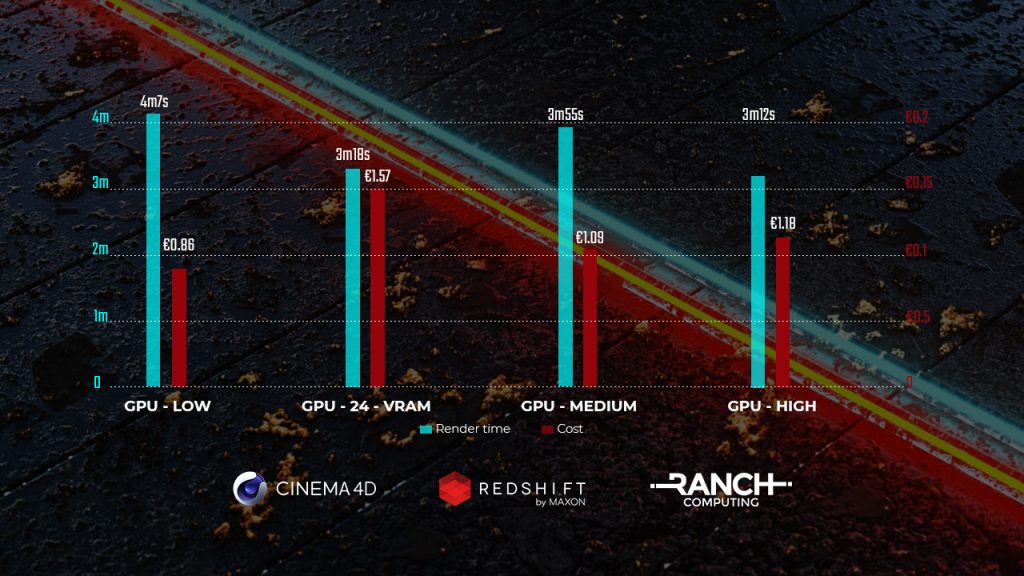
GPU Priority
- GPU-Low: €0.009 / OBh, 56 nodes
- GPU-24-VRAM: €0.011 / OBh, 80 nodes
- GPU-Medium: €0.012 / OBh, 112 nodes
- GPU-High: €0.016 / OBh, 224 nodes
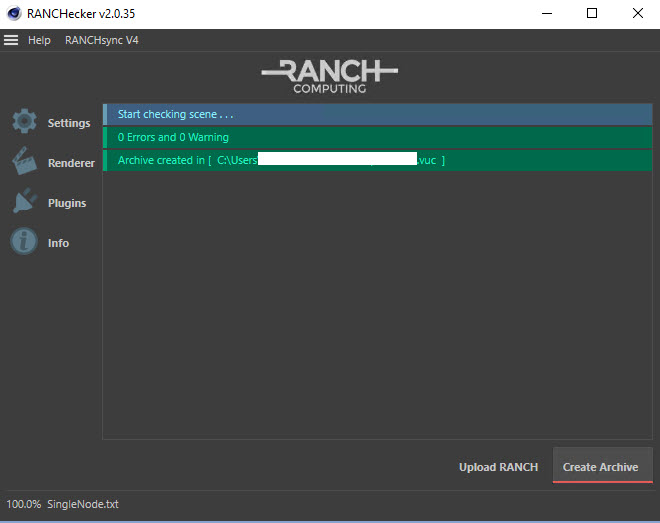
Click Create Archive, the plugin will check the scene and warn if there is any error, then upload it to the farm through RANCHsync.
Note:
- File name is maximum 20 characters.
- Ranch provides Cloudflare options for faster upload/download speed if you are far away from Paris, their data center. You can choose to use Cloudflare or not in your account settings.
After successfully uploaded, the project will be in queue to be rendered with chosen priority. Then, we can follow and monitor the process in Web Manager.


3. Download the results
When the render is done, the rendered frames will automatically downloaded to the destination folder (you can check it in RANCHSync). In case you want to do it manually, there are web download (a download link where you can get the frames directly) and FTP download (using FTP client with username, password and host provided by Ranch).
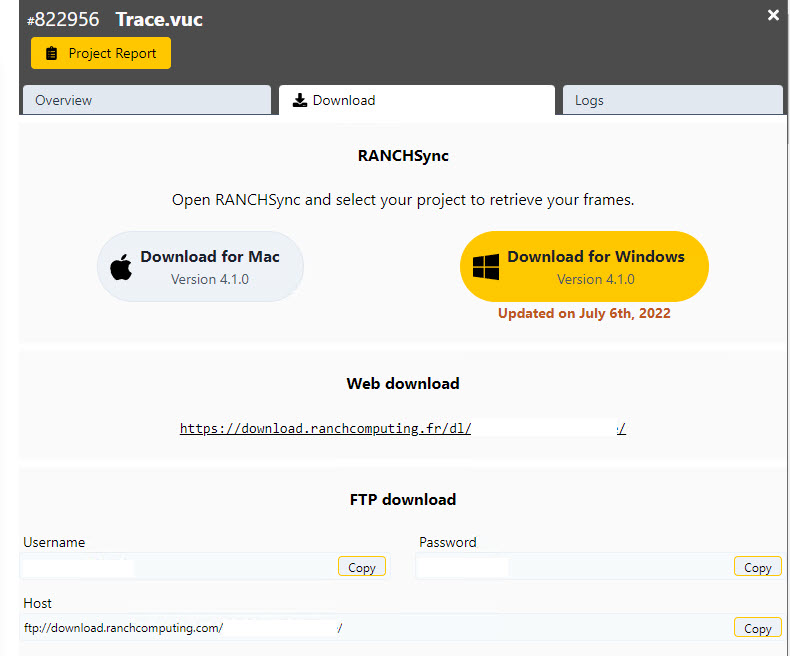
One interesting thing about Ranch is that they provide a project report after each job is finished. It has detailed information about the whole render process. You have everything you need here.
4. Test results on Ranch Computing
For the test, we will use “Trace” project made and shared by TFMSTYLE.
5. Conclusion
- Ranch’s documents and instructions can be a bit hard to follow at first, so we go step by step. Hope it will help you guys to start easier.
- GPU-Low is cheapest, and of course has the longest render time. GPU-High has the fastest render time, but interestingly not the most expensive. The most highest cost is of GPU-24-VRAM. Our suggestion is that you only should choose GPU-24-VRAM plan for VRAM-hungry projects.
- This is our detailed instructions for you to have a better understanding. We also test render time and cost between priority options for one same project for reference. It’s better to test your own project by yourself.
If there’s anything you want us to clarify, please leave a comment below.
See more: 6 powerful render farms for Redshift


No comments