


iRender workflow for Cinema 4D and Physical Renderer
Cinema 4D is a professional 3D modeling, animation, simulation and rendering software solution. Its fast, powerful, flexible and stable toolset make 3D workflows more accessible and efficient for design, motion graphics, VFX, AR/MR/VR, game development and all types of visualization professionals. Cinema 4D comes with its in-built Render Engines, that is Standard and Physical Renderer. In today’s article, we will find out how to render a Cinema 4D and Physical Renderer project on iRender Render Farm.

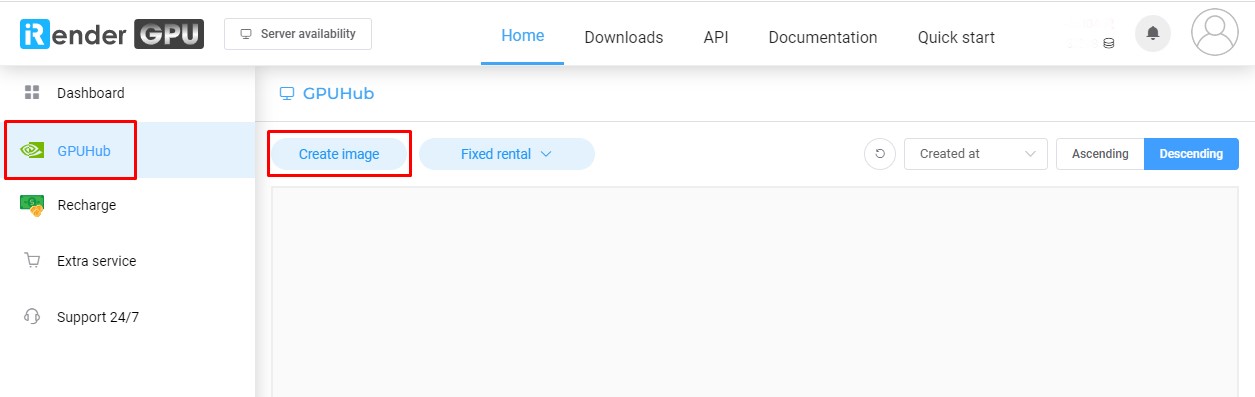
1. Set up an instance
The way to set up an instance on iRender is just the same as usual. After creating an account, you log in and see the dashboard. That’s where you manage and monitor almost everything: the instances, billing, payment (except rendering part). After that, you will create an instance (iRender calls it an “image”) to work on.
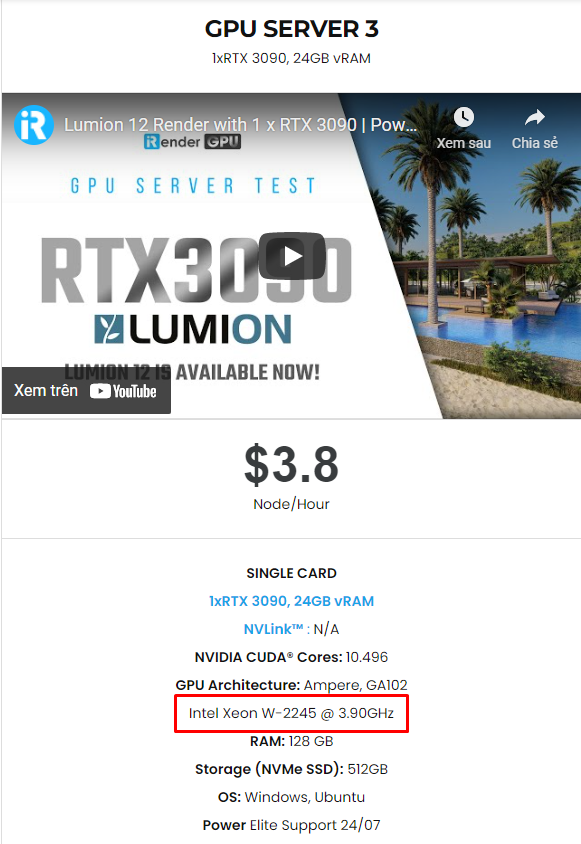
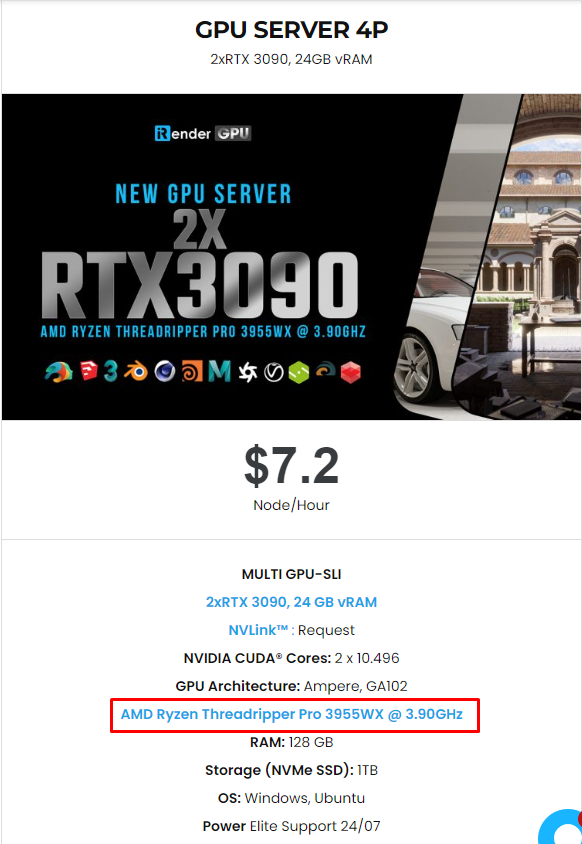
Now comes the important part: As iRender offers various options with each server having different specifications, which server should we choose? Physical Renderer in Cinema 4D only uses CPU for rendering. Okay, we can reduce the choice now. There are two types of CPU at iRender:
- Intel Xeon W-2245 (Server 3A and 4A).
- AMD Ryzen Threadripper Pro 3955WX (Server 4P, 5P, 8A and 9A).
AMD Ryzen Threadripper Pro 3955WX is more powerful than Intel Xeon W-2245, so of couse it is a more expensive option. We should choose either Server 3 (Intel Xeon W-2245) or Server 4P (AMD Ryzen Threadripper Pro 3955WX) for the best price. But if these servers are full (unavailable), we can use other servers instead.
Next step click the “Boot ready” button to is booting up the server. The server is ready and running, after some minutes. Just appears and access the remote server, by click on the button “CONNECT”.
Note: You should transfer the project files before booting the machine. iRender provides a 2-ways transfering app called Gpuhub sync, or you can use other 3rd parties services such as Google Drive, Dropbox, One Drive, Wetransfer, etc.
2. Set up Cinema 4D on iRender server
After connecting to the server, you will see it is a blank computer. So now you need to install Cinema 4D (one time), and use your license.
When installation is finished, it’s time for you to start rendering your projects.
We will also do a test for you guys to check the performance. The test project is made and shared by TFMSTYLE.

SECTION project file by TFMSTYLE
3. Let’s test iRender servers
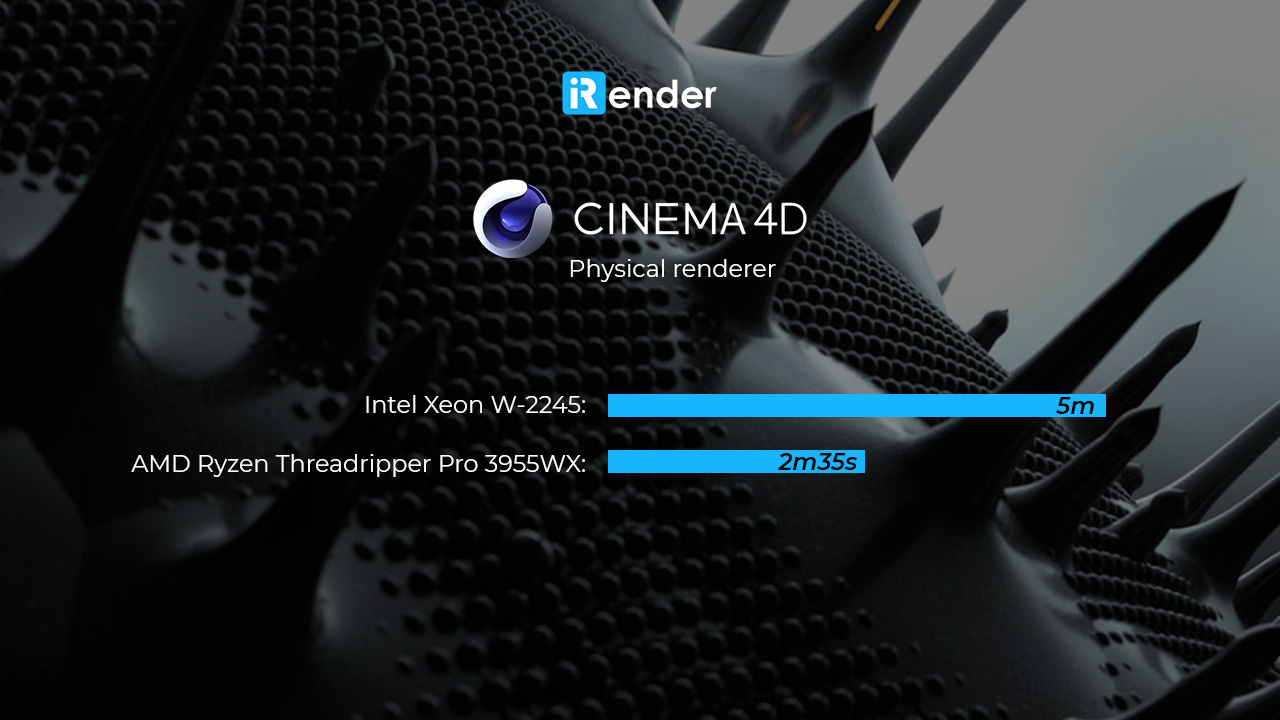
Intel Xeon W-2245
- Total rendering time: 5 minutes
- Total cost: ~ $0.32 (Server 3A)
AMD Ryzen Threadripper Pro 3955WX
- Total rendering time: 2 minutes 35 seconds
- Total cost: ~ $0.31 (Server 4P)
4. Conclusion
After testing Cinema 4D and Physical Renderer on iRender Farm, we come to some conclusions and notes for you:
- Server with AMD Ryzen Threadripper Pro 3955WX is much faster than server with Intel Xeon W-2245 (about 2 times). The cost is kinda the same.
- The costs does not include installation time.
Tip: you can install Cinema 4D on 1 x RTX 3090 then change to other servers to render. A good thing is that they keep your setup and will not remove them if you change packages or come back next time.
- This is just our workflow for you to have a better understanding. We try to make it simple and short but still have enough information so that you can follow. We also put testing time and change it to credits, you can take that as a reference to decide by yourself.
If there’s anything you want us to clarify, please leave a comment. Read more VFX Rendering articles: Workflow for Daz Studio and Iray on iRender


No comments