


Rebus workflow for Blender and Cycles
This article is dedicated for Blender and Cycles rendering using Rebus farm. We will not explain to you about the software or the render farm, as it is clear for all of us. We will try to focus only on the Rebus workflow and how you should start rendering your project on Rebus. Let’s get started!
1. Set up Rebus software for rendering
First of all, you should go to the Rebus farm website and register an account. Just click “Log in”, they will have an orange dropdown and you should click “sign up here” at the bottom. After creating an account, a verification email will be sent to you. Make sure you click their link to verify the account to be able to login after that.
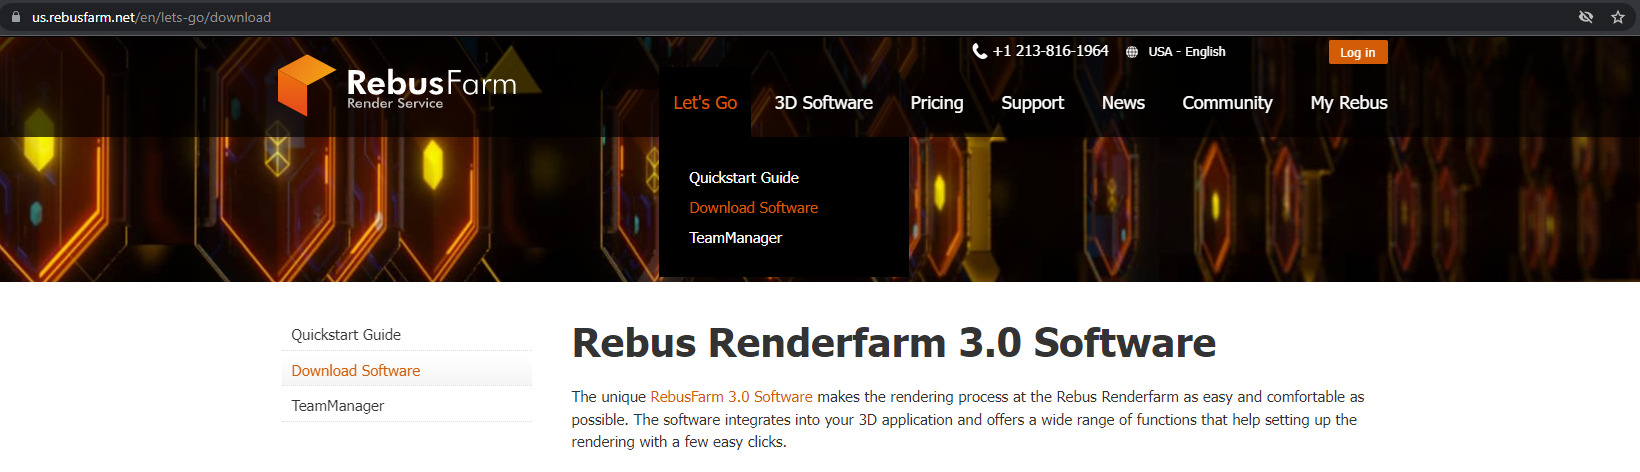
Now when you have an account, you should come back to Rebus website and download Rebus 3.0 software.
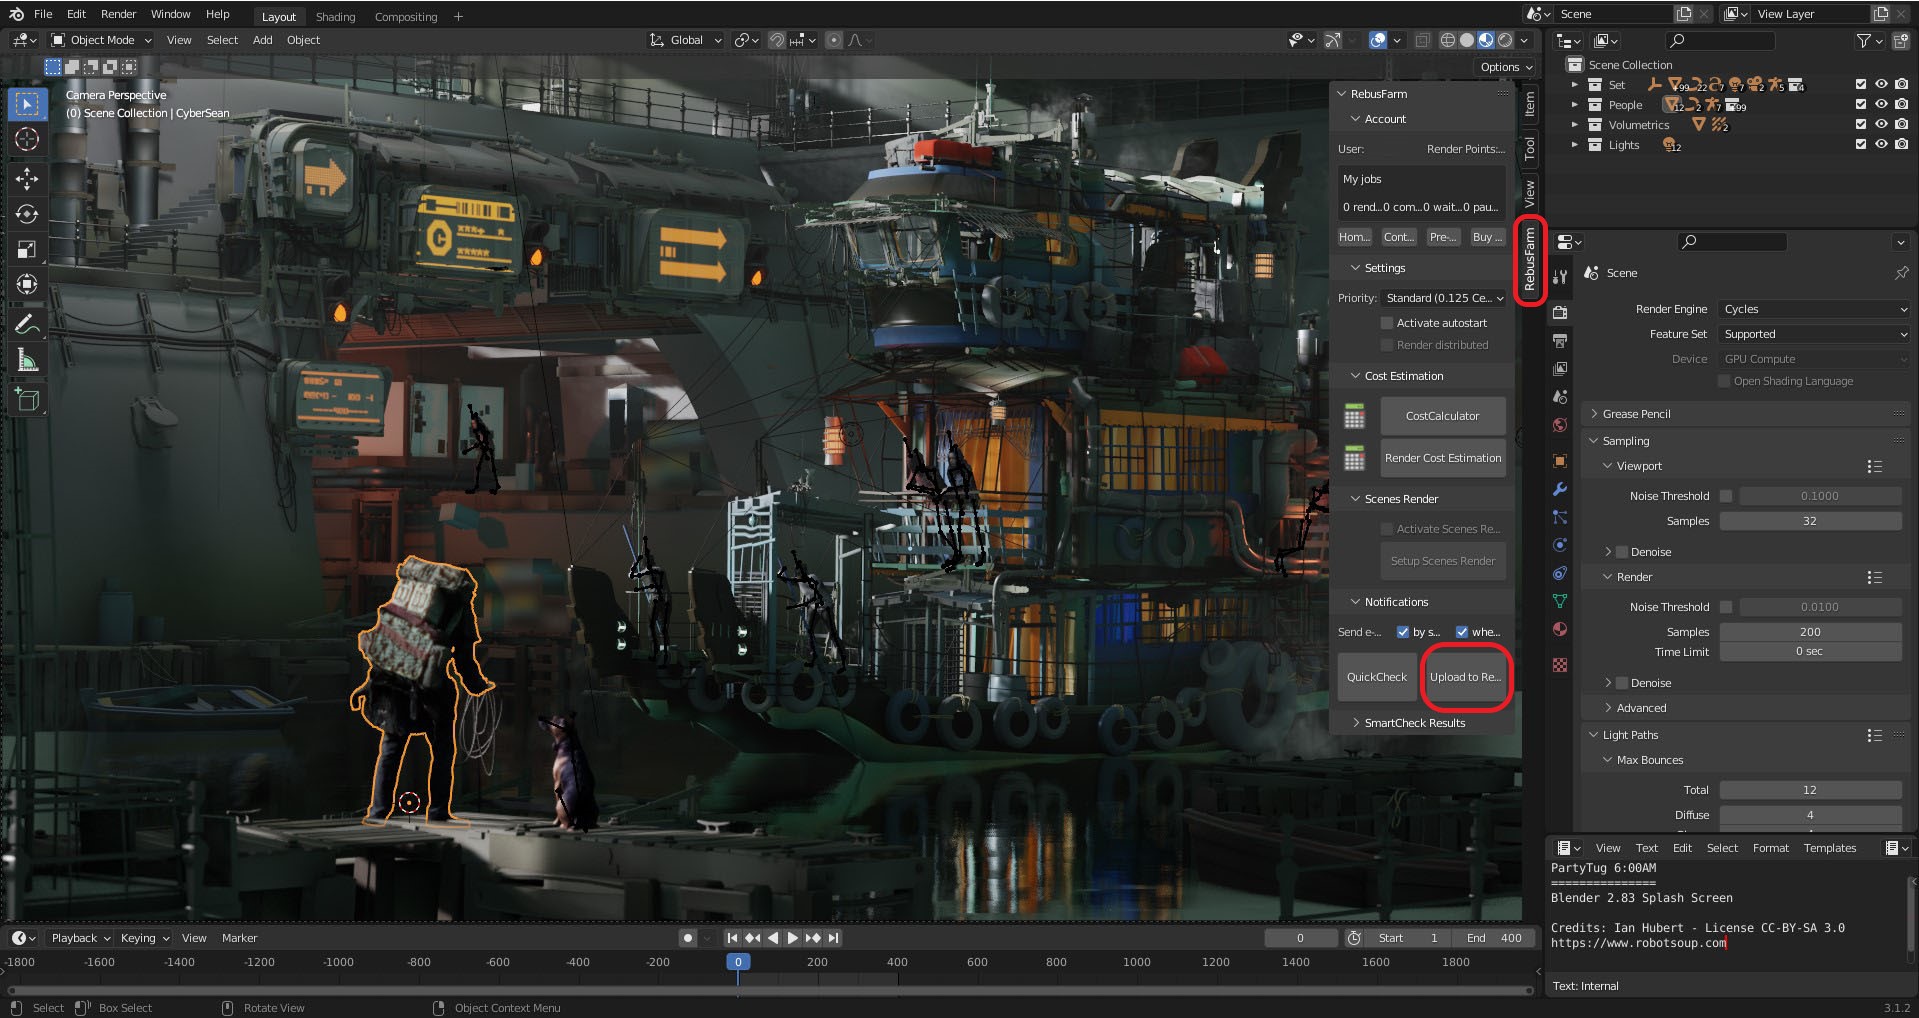
Then you find the file you have downloaded (it’s the RebusDropDownload), install it and login by your Rebus account. Now, open Blender and It will be integrated into your software (on the right side).
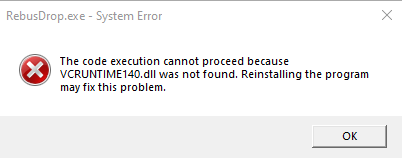
A note for you is that you should make sure to install VCRUNTIME140.dll. We first download the software and cannot install it because of this.
2. Submit your project to render
In our article, we suppose that you have a project ready. We used PartyTug 6:00AM from Blender demo files. Now you have Rebus software integrated, you should check the settings before submitting your job. Click Upload to RebusFarm when you finish checking.
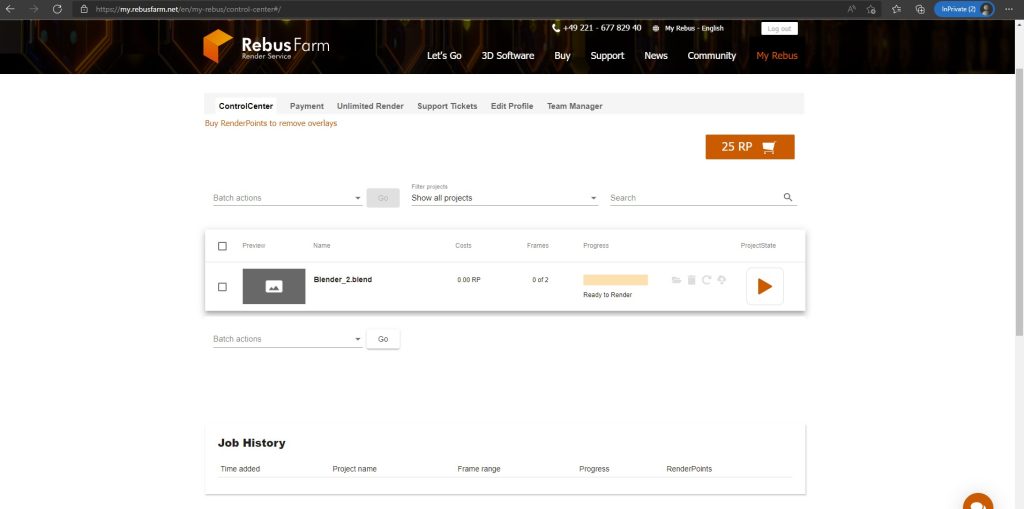
It will have a sign showing you succeed in submitting the job. You can also come to your account on their website (My Rebus > ControlCenter) to check for the process. When you finish uploading, it will have the Start RenderJob button. You click it and wait for it to render (we tried rendering 2 frames first).
This is the result for our test project:
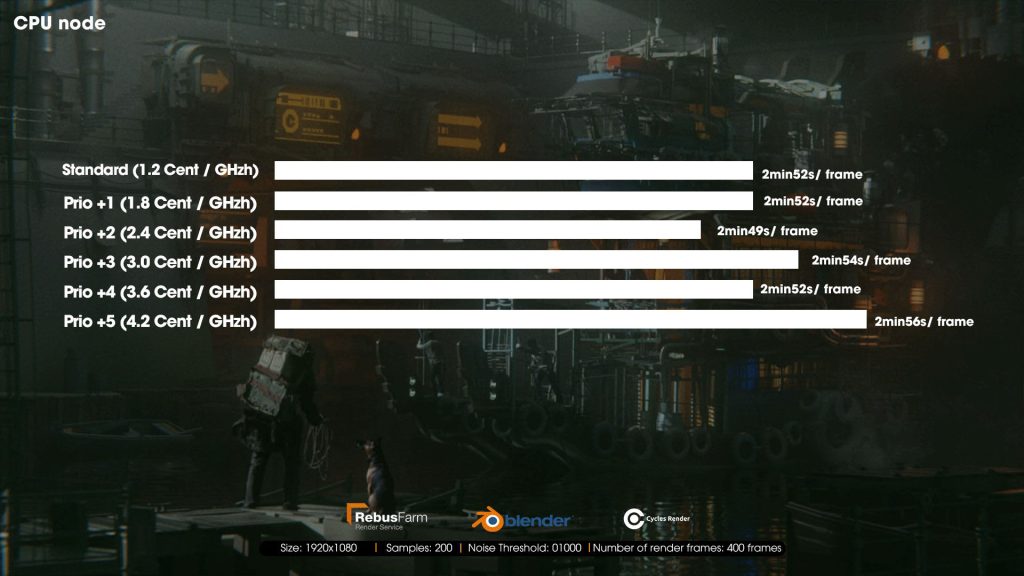
CPU node:
Standard (1.2 Cent / GHzh): 2min55s/ frame (EUR 0.19 / frame so total 400 frames will be EUR 76 ~ USD 80)
Prio +1 (1.8 Cent / GHzh): 2min52s/ frame (EUR 0.28 / frame so total 400 frames will be EUR 112 ~ USD 118)
Prio +2 (2.4 Cent / GHzh): 2min49s/ frame (EUR 0.36 / frame so total 400 frames will be EUR 144 ~ USD 152)
Prio +3 (3.0 Cent / GHzh): 2min54s/ frame (EUR 0.47 / frame so total 400 frames will be EUR 188 ~ USD 198)
Prio +4 (3.6 Cent / GHzh): 2min52s/ frame (EUR 0.56 / frame so total 400 frames will be EUR 224 ~ USD 236)
Prio +5 (4.2 Cent / GHzh): 2min56s/ frame (EUR 0.66 / frame so total 400 frames will be EUR 264 ~ USD 278)
Prio +6 (4.8 Cent / GHzh): unknown
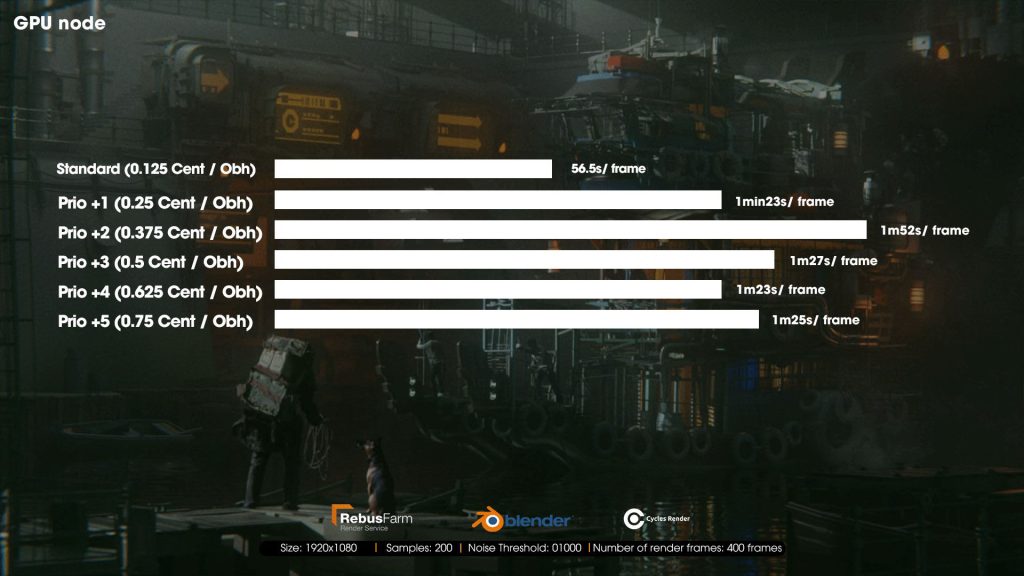
GPU node:
Standard (0.125 Cent / Obh): 56.5s/ frame (EUR 0.08 / frame so total 400 frames will be EUR 32 ~ USD 33.7)
Prio +1 (0.25 Cent / Obh): 1min23s/ frame (EUR 0.23 / frame so total 400 frames will be EUR 92 ~ USD 96.82)
Prio +2 (0.375 Cent / Obh): 1m52s/ frame (EUR 0.31 / frame so total 400 frames will be EUR 124 ~ USD 130.5)
Prio +3 (0.5 Cent / Obh): 1m27s/ frame (EUR 0.39 / frame so total 400 frames will be EUR 156 ~ USD 164.2)
Prio +4 (0.625 Cent / Obh): 1m23s/ frame (EUR 0.47 / frame so total 400 frames will be EUR 188 ~ USD 197.9)
Prio +5 (0.75 Cent / Obh): 1m25s/ frame (EUR 0.37 / frame so total 400 frames will be EUR 148 ~ USD 155.8)
Prio +6 (0.875 Cent / Obh): unknown
3. Take the results
When you finish rendering each frame, you can come to the place where you put the output to take your result.
4. Conclusion and notes
After testing Blender and Cycles with Rebus farm, we come to some conclusions and notes for you:
- Once you have finished uploading your scene and clicked the Start RenderJob button, you can turn off your PC.
- The GPU node is definitely faster than the CPU node. But the price is higher.
- Interestingly, the Standard mode of GPU node is the fastest in rendering. However, it has the longest queue (about 3 hours in our case). We asked and knew that it depends on the availability of Rebus service at that time. Other priority modes have shorter queue time (less than 10 minutes).
- For some reason we cannot try priority +6 in both CPU and GPU nodes.
- This is just our workflow for you to have a better understanding. We try to make it simple and short but still have enough information so that you can follow. We also put testing time and change it to credits, you can take that as a reference to decide by yourself.
See more: Supported 3D Software by RebusFarm
If there’s anything you want us to clarify about Rebus workflow for Blender and Cycles, please leave a comment.


No comments