


Why Are My Textures Missing or Pink on the Render Farm?
Seeing pink or missing textures after submitting a render job can be frustrating, especially when everything looked correct on your local workstation. In most cases, the renderer cannot locate or read the texture files, so it replaces them with placeholder colors such as pink, magenta, or gray. The missing textures render farm or pink textures render farm issue is usually caused by incorrect file paths, missing assets, inconsistent file names, network drive access problems, unsupported image formats, or improperly named UDIM textures. Fortunately, render logs often point directly to the missing files or failed paths, making the problem much easier to diagnose. Once you collect all required assets, update broken paths, or switch to relative paths, your project should render correctly. In this article, we’ll explore the most common causes and practical solutions.
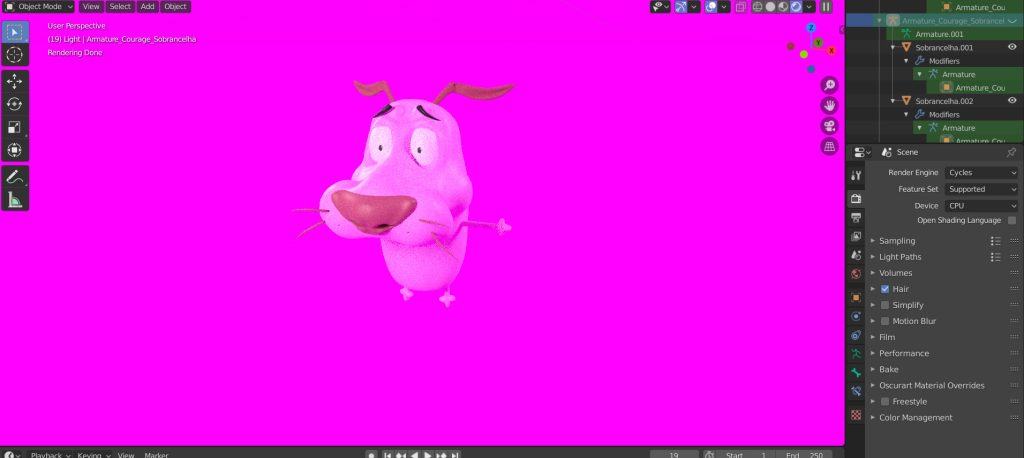
Pink or magenta is not a random color chosen by rendering software. Developers intentionally use it because it is highly visible and rarely appears in real-world scenes, making missing assets easy to spot at a glance. When you encounter pink textures render farm issues, the bright placeholder color serves as a clear warning that the renderer cannot locate or load one or more required files. Instead of hiding the problem, it points you directly to an issue that needs attention, helping you identify and fix missing assets before delivering the final render.
Table of Contents
Why the Node Cannot Find What Your Machine Can
On your local workstation, your project usually runs without any issues because all required files are already stored on your computer. The scene knows where every texture is located, and your operating system can easily access those folders. As long as the file paths remain valid, your software loads everything automatically without requiring any extra configuration.
A render node works very differently. It is a separate computer running in a different environment, so local paths such as D:\Projects\Textures or C:\Assets have no meaning unless those files are uploaded together with the project. If the textures were never packed, collected, or transferred to the render node, the renderer simply cannot find them. As a result, materials may appear pink, gray, or completely untextured in the final output.
Another common issue involves differences between operating systems. Windows treats Wood.png and wood.png as the same file, but Linux recognizes them as two different filenames. If your scene references a file using the wrong capitalization, it may work perfectly on your Windows workstation while failing on a Linux render node. Checking file names, collecting all project assets, and using relative paths whenever possible can prevent these problems before you submit your render job.
How Your Textures Are Referenced
The way your textures are referenced determines whether a render node can locate them successfully. The table below summarizes the most common scenarios and how they behave on your local computer versus a remote render node.
| How Textures Are Referenced | Works on Your Local Machine | Works on a Render Farm Node |
| Original path on your local drive | ✅ Yes | ❌ No. The referenced path does not exist on the render node. |
| Relative path with all assets collected | ✅ Yes | ✅ Yes |
| Path to a network drive | ✅ Yes | ⚠️ Only if the render node has access to the same network drive. |
| Uppercase or lowercase file names | ✅ Yes on Windows | ❌ May fail on Linux nodes because filenames are case-sensitive. |
| Inconsistent UDIM naming | ✅ Often yes | ❌ Can fail if the UDIM naming pattern is incorrect or incomplete. |
How to Trace and Fix the Problem
Most texture issues can be resolved quickly if you follow a systematic approach. Instead of checking every asset manually, start with the information provided by your rendering software and work through the project step by step.
- Read the render log first. Most render engines report the exact file that cannot be found or loaded. This helps you identify the broken path immediately instead of searching through the entire project.
- Collect all required assets. Use your DCC application’s Collect, Archive, or Pack feature to gather textures, caches, simulations, and other dependencies into a single project folder. This simple step prevents many common rendering issues.
- Use relative file paths. Update your project so textures are referenced from the project directory instead of a local drive such as D:\ or C:\. Relative paths are much more portable across different machines.
- Verify your UDIM textures. Make sure every UDIM tile follows the correct naming convention and is included with the rest of the project files.
- Run a small test render first. Rendering a few frames lets you detect missing assets early. Spending a few minutes on testing is much better than discovering problems after an overnight render.
iRender
Some rendering platforms use dedicated submitter tools that automatically collect project assets, convert file paths, and even warn you about missing files before submission. This can reduce the chance of missing textures render farm issues, especially for users managing large projects with many dependencies.
With iRender’s Infrastructure as a Service (IaaS) model, you work on a full remote workstation just like your own computer. One limitation is that there is no automatic submitter to collect your assets. You are responsible for packaging and uploading all required textures, UDIMs, caches, and other project files. If any required file is missing, the render may not produce the expected result.
Pipeline uses tools or versions a SaaS farm does not have?
Run it on a server you control. Your renders, your rules →
FAQ
Why are my textures pink on the render farm?
Pink or magenta textures usually indicate that the renderer cannot locate or read one or more texture files. This can happen if the files were not uploaded, the file paths are incorrect, the filenames do not match exactly, or the required UDIMs are missing. Most pink textures render farm issues can be identified by checking the render log, which typically reports the missing files or invalid paths.
Why do textures work locally but fail on a render farm?
Your local computer already has access to your project folders, so texture paths remain valid during rendering. A render node is a different machine with its own file system, meaning local paths such as D:\Projects no longer exist unless the assets are uploaded. Differences in operating systems, network drive access, and filename capitalization can also prevent the renderer from finding the required files.
How do I stop missing texture errors before submitting?
The best way to avoid missing textures render farm problems is to prepare your project before uploading it. Collect or archive all required textures, caches, and UDIM files into a single project folder, use relative paths whenever possible, verify that filenames and UDIM patterns are correct, and perform a small test render first. These simple checks can prevent most texture-related issues before the full render begins.







No comments