


How to render a Cinema 4D & Redshift project on iRender
iRender is quite a unique render farm, their approach is IaaS. Learn how to render a Cinema 4D & Redshift on iRender with us. And see if their workflow is different from other farms.
Table of Contents
1. Create an account and upload project
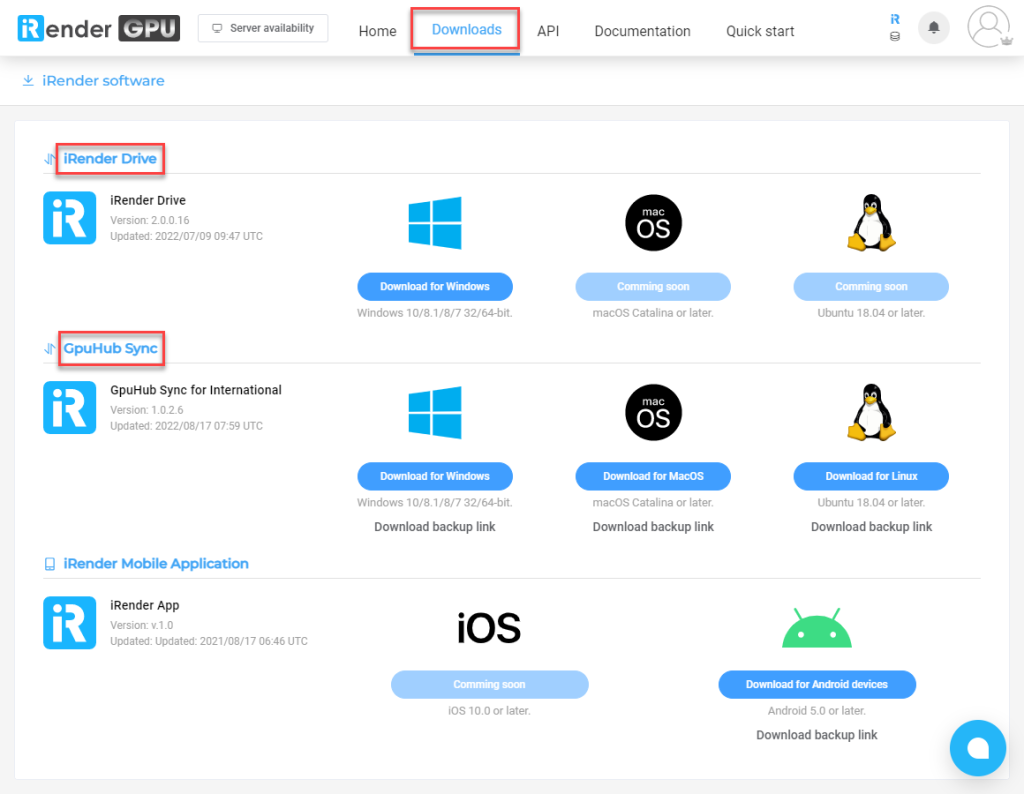
First of all, you will need an account on iRender. Log in, go to Downloads and download iRender Drive (for Mac and Linux users, you should use the previous app GpuHub Sync).

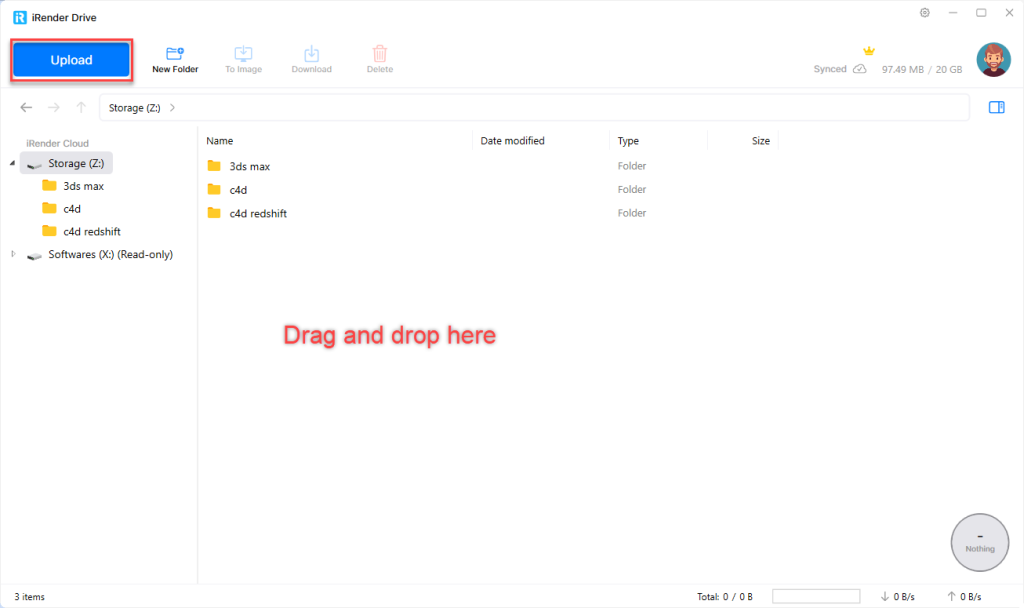
Log in to iRender Drive. You will see 2 storages (Z and X) that correspond to disk Z and X on their servers. Storage X (read-only) stores the installers of various 3D software and renderers. Storage Z is where you upload our project. Click Upload or Drag and drop the projects to Z, the project will sync to the server (two-way). iRender has R21 to S26 version for Cinema 4D and several Redshift versions.
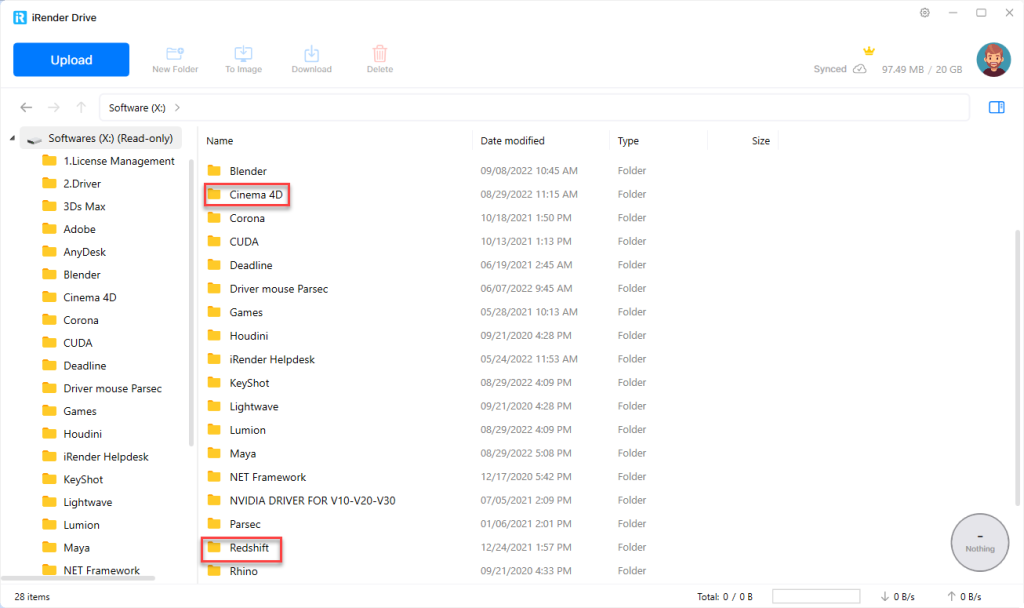
Tip: We can transfer our installers from our computer to Z, together with the project.
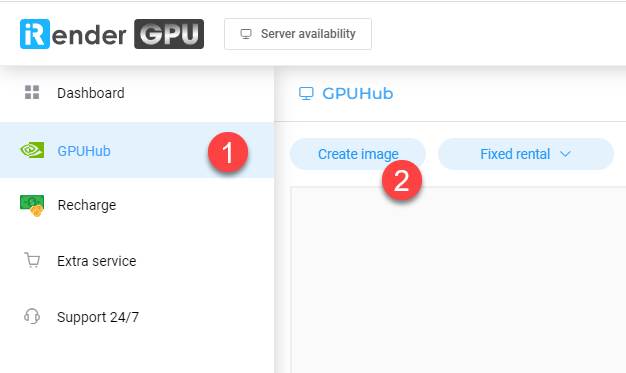
2. Set up the instance
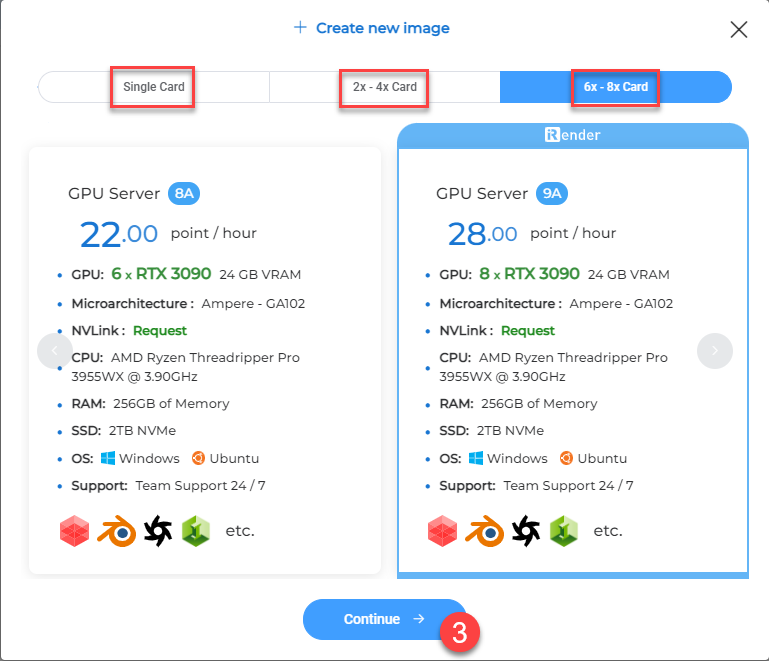
Next, we go back to the Web Manager. GPUHub > Create image, choose a server and continue. There are various packages with different number of GPUs (1, 2, 4, 6 & 8 GPUs).
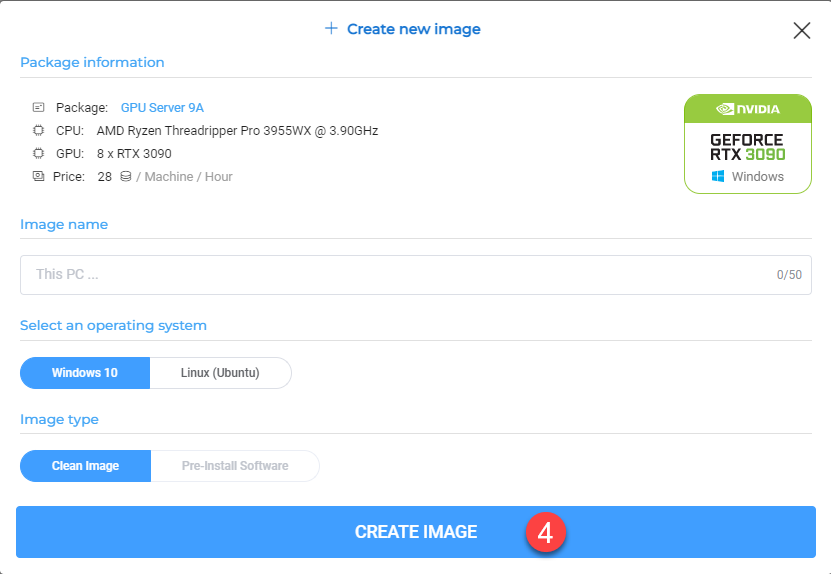
Name the image, select OS (Windows 10, Ubuntu) and Create Image. Wait some minutes for Boot ready to show up. Click Boot ready > Boot machine to turn on the image. It will take some time to process.
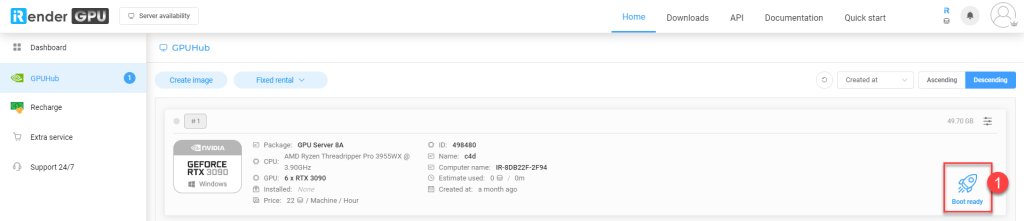
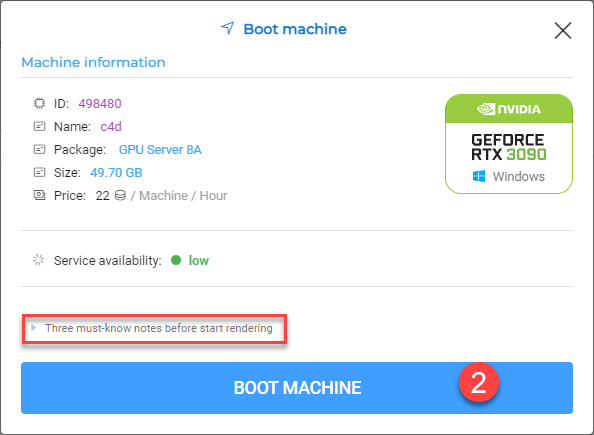
When Connect, Shutdown appear, the image is ready. And we are ready to start rendering.

Note:
- The system starts charging the moment Connect appears, so only boot the image when you are ready to render.
- Don’t forget to read the notes before using in the 1st time:
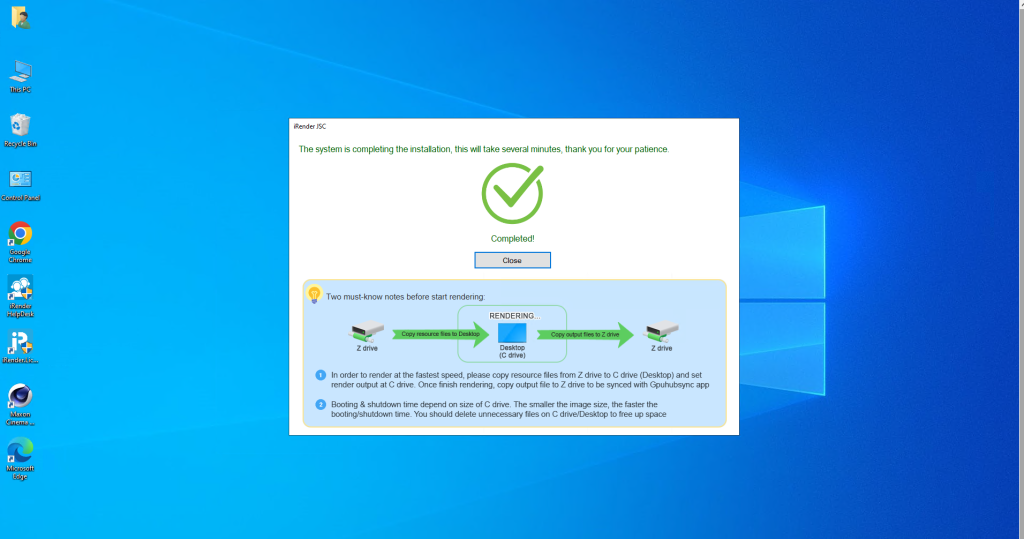
- Z drive is usually used for transferring files. It’s better for us to work in C drive.
- Optimize image size for faster booting/shutting down time.
- Deactivate the license before shutting it down.
3. Render the project
Click Connect. A remote desktop file will be downloaded to our computer. Open it and enter your password. Now we are on their server. From this step, it is no different from using your own computer. The server is blank so we need to install the necessary DCCs (the software will be saved for the next sessions).
> Find the installers in X or Z disk (if you have transferred them by iRender Drive).
> Download the installers directly from the website.
After installing, open the Cinema 4D, add your C4D and Redshift license (iRender provides the powerful hardware, software licenses are not included. They provide a free Redshift license for Prime users). Now open the project and render.
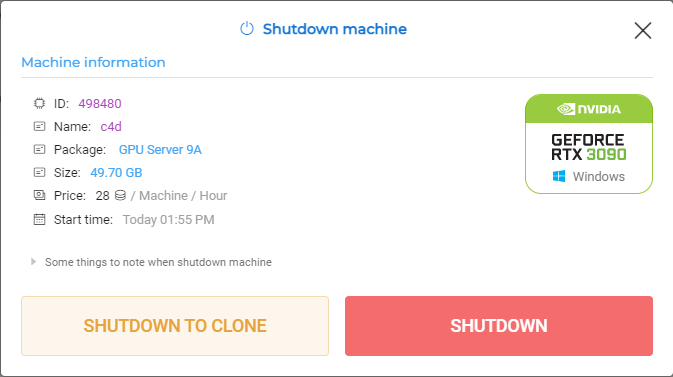
After the render is finished, copy the results to Z storage. They will sync back to iRender Drive in your local computer. Last step would be shutting down the server by clicking Shutdown > Shutdown/Shutdown to clone in the Web Manager.
4. Test results
For the test, we will use “Trace” project made and shared by TFMSTYLE.
| Package | Render time | Render cost |
| Server 9A (8 x RTX 3090) | 1m22s | $0.64 |
| Server 8A (6 x RTX 3090) | 1m27s | $0.53 |
| Server 5P (4 x RTX 3090) | 1m58s | $0.48 |
| Server 4P (2 x RTX 3090) | 3m36s | $0.43 |
| Server 3P (1 x RTX 3090) | 6m46s | $0.5 |
5. Conclusion
- It will take time and effort to set up the working instance in the 1st time so we make a detailed instruction. After that, it’s the same as using our computer.
- Server 8 x RTX 3090 is the fastest, while server 2 x RTX 3090 is the most economical.
- This is our detailed instructions for you to have a better understanding. We also test render time and cost between server options for one same project for reference. It’s better to test your own project by yourself.
If there’s anything you want us to clarify, please leave a comment below.
See more:


graliontorile | 17 October, 2022
|
Wonderful work! This is the kind of information that should be shared around the web. Disgrace on the seek engines for not positioning this submit upper! Come on over and visit my website . Thanks =)